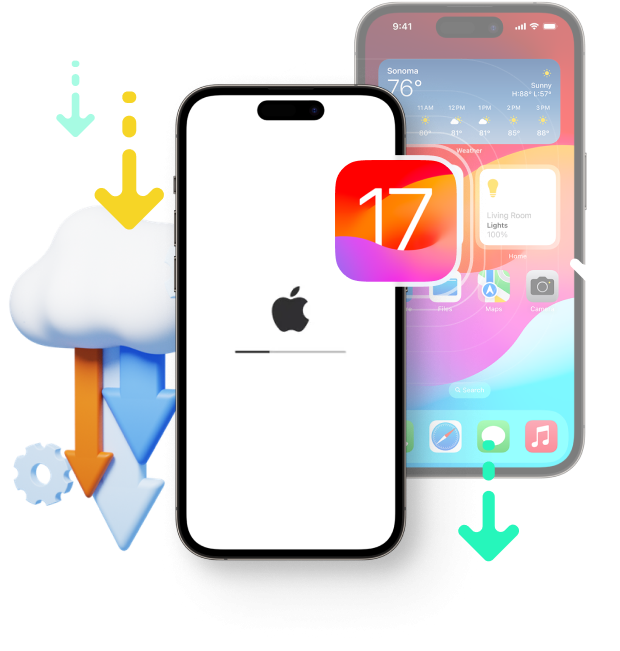
iOS 17 Downgrade: Guide to Rollback to iOS 16
Experiencing issues with iOS 17? Don’t panic. Follow the step-by-step guide to downgrade to iOS 16.
iOS Downgrade: Risks and Challenges
iOS rollback is inherently more complex than the update process. It is important to make sure that you are well-prepared and informed about any possible risks.
Potential Data Loss
iOS downgrades often entail erasing all device data and reinstalling an older OS. It’s crucial to back up all data beforehand.
Solution:
Backup iPhone data using Dr.Fone/iTunes/iCloud
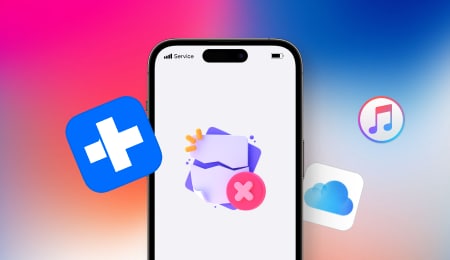
Device Instability
During and after the iOS downgrade process, it is not uncommon for your device to become stuck or frozen.
Solution:
Fix any iOS issues with Dr.Fone without data loss.
Apple's Restrictions on Downgrading
The Apple signing window, typically 2 weeks, lets you install specific iOS versions. After that, iOS downgrading is impossible.
Advice:
Downgrade iOS before Apple stops signing the older firmware.
How to Downgrade From iOS 17 to iOS 16?
Now that you know the prerequisites for downgrading from iOS 17, you can easily meet the requirements. If you are ready to downgrade to an older iOS version that Apple still signs, here are three methods to revert from iOS 17 to 16.
1. Downgrade iOS 17 to a Version That Apple Still Signs
Things to note: Understand the time limit for iOS downgrade
After every release of a new iOS version, Apple only allows you to downgrade to an older iOS update for a limited amount of time, likely a week or two.
Solution 1:
One-Click Solution to Downgrade iOS 17 (Fast & Easy to Use)
If you are a beginner and do not have much technical knowledge about iOS downgrading, consider picking a third-party tool. Developed by Wondershare, Dr.Fone - System Repair (iOS) provides a one-click solution to downgrade iOS 17 to a previous stable version.
Dr.Fone - System Repair (iOS)
Steps to Downgrade iOS 17 With Dr.Fone:
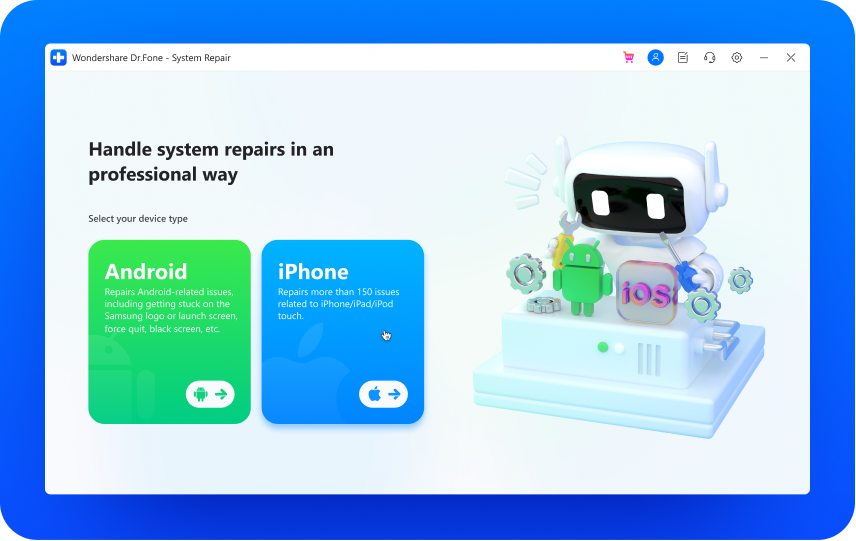
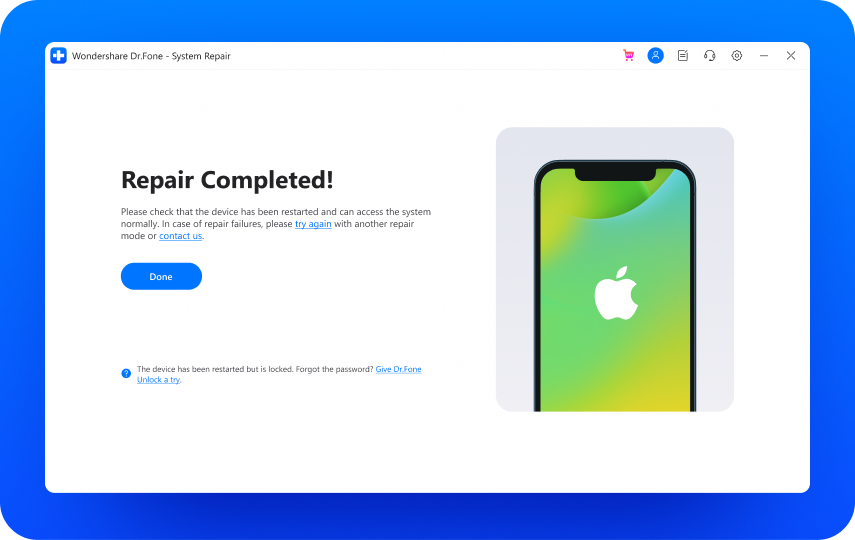
1. Connect the iOS device to your computer, launch Dr.Fone and select the "iPhone" module.
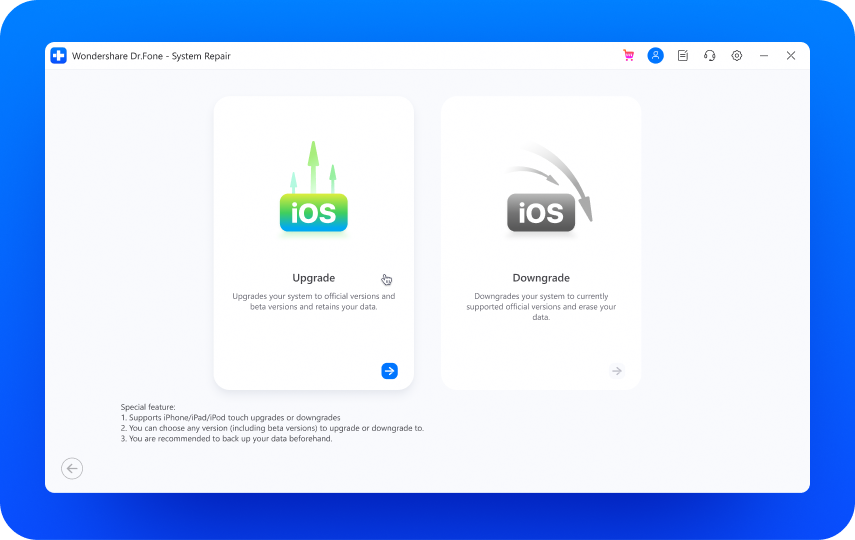
2. Click on "iOS Upgrade/Downgrade" and then on "Downgrade iOS".
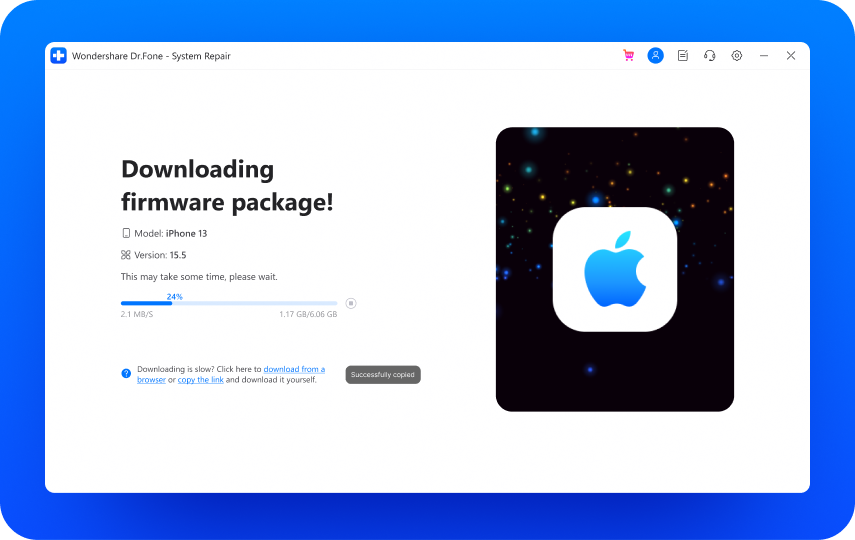
3. Choose the previous iOS version you want to downgrade and start to download the firmware package.
4. Wait for a moment, and the iOS 17 will be uninstalled successfully.
Solution 2:
Use iTunes to Go Back to the Old iOS
Since you can upgrade your iOS from the iTunes app on your computer, you can also perform an iOS 17 downgrade with iTunes. But it has its cons. For instance, you might lose the existing data on your phone as it would restore your device to its factory settings. The process is also a bit technical, and you might end up damaging your device in the process.
What You Need:


Steps to Downgrade iOS 17 Using iTunes:
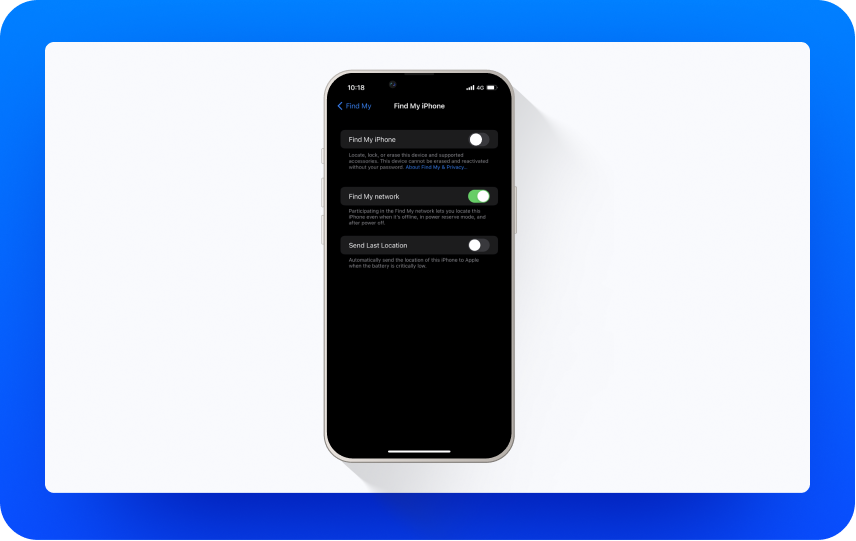
1. From your iOS device go to "Settings" > "[Your name]" > "Find my" > "Find My [device] " > Disable "Find My [device] ".
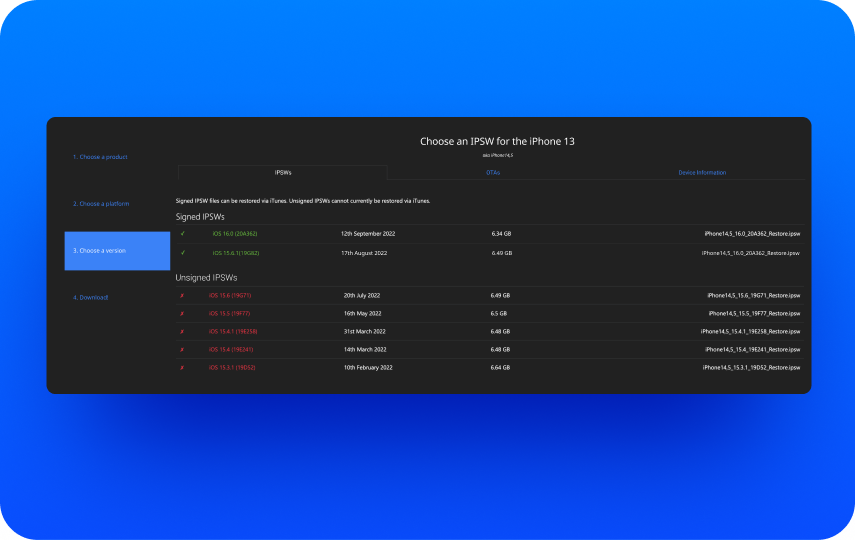
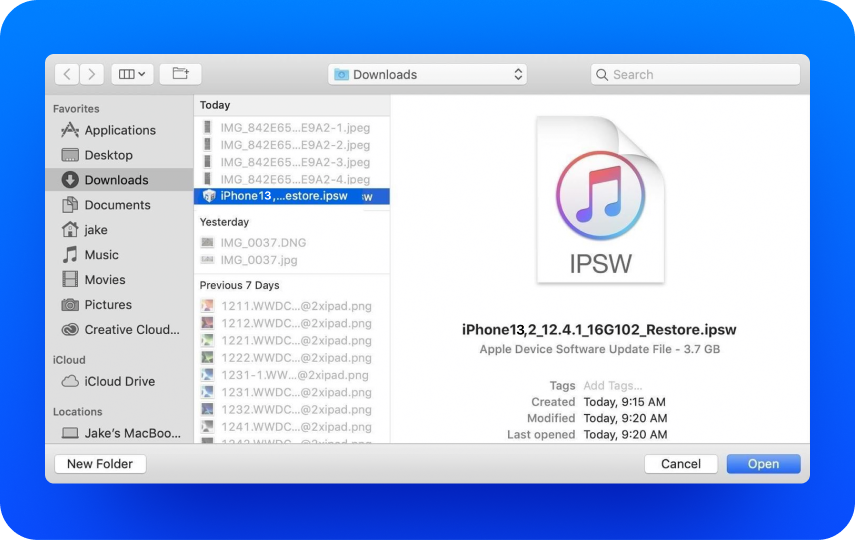
2. Get an iOS version you want from IPSW.me and download the IPSW file to your computer.
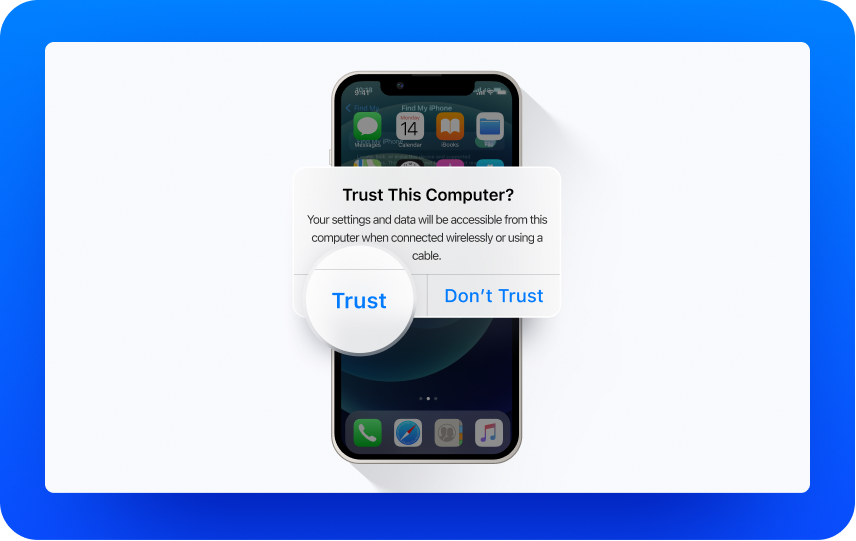
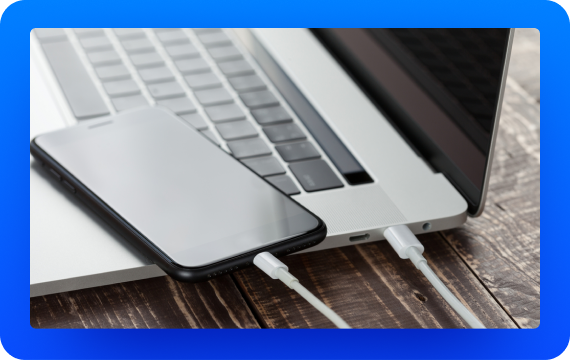
3. Then connect your iOS device to the computer and click "Trust" in the "Trust This Computer?".
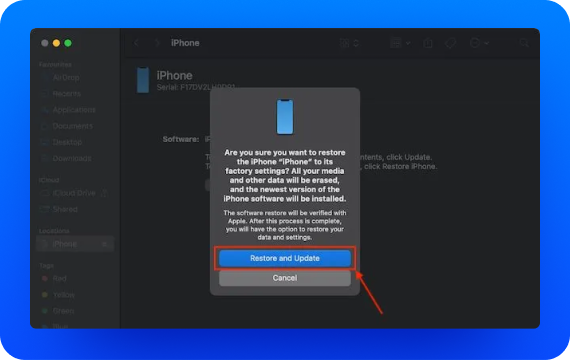
4. Select your iOS device in iTunes. Then, go to its "Summary" tab and hold the Shift key in Windows or the Alt/Option key in Mac as you click the "Restore" Button.
5. Select the IPSW file you downloaded and click "Open".
6. Click Restore to confirm. Wait for a while and let iTunes complete the iOS 17 downgrade.
If you're using a Mac with macOS Catalina or later, open a new Finder window to access your iPhone/ iPad instead of iTunes. Click on Trust and then proceed with the same steps above.
Solution 3:
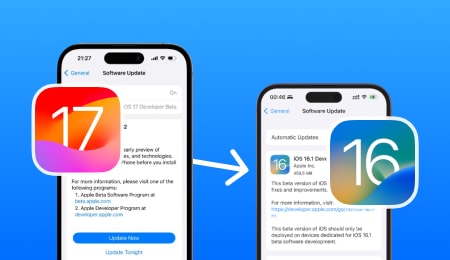
Downgrade From iOS 17 Beta to iOS 16
If you've previously installed the iOS 17 Beta or iPadOS 17 Beta through Apple's Developer Program or Software Beta Program, you'll need to follow the specific steps below to safely revert to a public iOS version.
1. Connect your iPhone/iPad to the computer using a Lightning cable.
2. Launch iTunes on your PC, or Finder on your Mac.
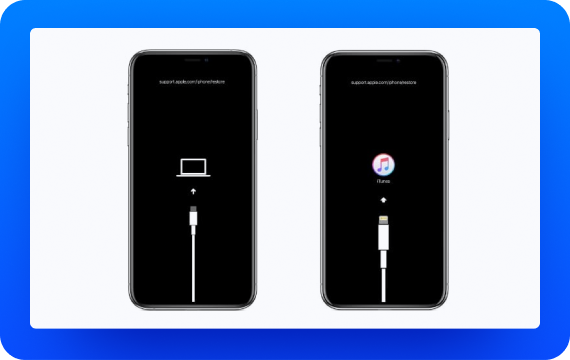
3. Put your iPhone/iPad in Recovery Mode. The methods vary on different devices.
4. Click Restore on the popup window to restore your device and install the latest public iOS/iPadOS version.
5. Wait until the process is complete. This will wipe all data on your device.

2. Downgrade iOS to a Version No Longer Signed by Apple
know, the entire process of downgrading an iOS version is time-sensitive. If you have passed the downgrade validity period but still want to downgrade to a version no longer signed by Apple, then you need to use a third-party tool. By taking the assistance of tools like TinyUmbrella, FutureRestore and TaigOne Downgrader, you can install any supported iOS version on the device. They mimic Apple's signature, letting us install personalized firmware (iOS version) on iDevices.
The entire process would be pretty technical, and it might not yield positive results. Since these third-party tools are not supported by Apple, you need to jailbreak your device to do it. This is not recommended as it will affect the warranty of your device, and you would no longer have access to the official iOS releases as well. Furthermore, it will make your device vulnerable to unwanted security threats.
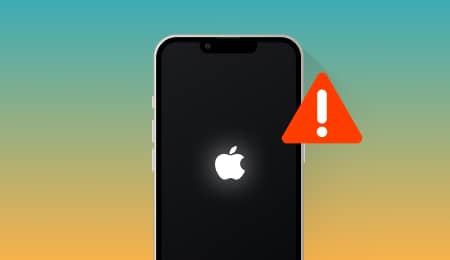
iOS 17 Downgrade Troubleshooting
 Quick Fixes
Check the Internet Connection: An inconsistent internet connection is another prominent cause of this error. It happens when the download of the iOS update is halted in between (due to a poor connection). Go to your phone's WiFi settings to further diagnose this.
Quick Fixes
● iPhone 8 and Later: Quick-press the Volume Up button first. Let it go and quick-press the Volume Down button. Subsequently, hold the Side button and let it go once the phone restarts.
● iPhone 7/7 Plus: Press and hold the Volume down button and the Sleep/Wake button simultaneously. Keep pressing them until the Apple logo appears.
● iPhone 6, 6s Plus, or iPhone SE: Press and hold the Sleep/Wake button and the Home button simultaneously. When the Apple logo appears, release both buttons.
Connect it to iTunes: In no time, iTunes will automatically detect that your device is in recovery mode and display the setup prompt. Confirm your choice and restore your device to factory settings to fix this.
Quick Fixes
Boot your iPhone in Recovery Mode: You can also take the assistance of iTunes and boot your device in Recovery Mode to resolve this problem. Just connect the iPhone to your computer and open iTunes. Then, forcefully restart your device using the correct key combinations (already listed above). Subsequently, iTunes will detect as soon as your phone boots in the Recovery Mode. When you get the setup prompt, click on the "Restore" button to reset your device.
Quick Fixes
Disable Find my iPhone: Before connecting your device to iTunes, make sure that the Find my iPhone feature is disabled. To do this, go to its iCloud Settings > Find my iPhone and turn off this feature.
Update iTunes: You should use an updated version of iTunes to downgrade iOS 17. Launch iTunes on your system and go to Help > Check for Updates. This will make iTunes check for any available updates.
Quick Fixes
Use a 3rd party tool: If nothing else seems to work, consider using a dedicated iOS repairing tool like Dr.Fone - System Repair (iOS). It can fix all kinds of iOS and iTunes-related issues without causing any harm to your device. Just launch the application and follow a simple click-through process to put your phone out of the loop and downgrade it to a stable iOS version.
Quick Fixes
Obtain your device's SHSH blobs: Connect your iPhone/iPad to your computer and open iTunes. Then, select your device and go to Summary. Next, click on the "Serial Number" field until it displays the ECID number. Now, copy the ECID code and go to any online source to convert it into hexadecimal code. Next, open TSS Saver, and input your ECID and Model Identifier. Finally, click Submit and download your SHSH2 blobs.
Quick Fixes
Quick Fixes
Quick Fixes
Check the Internet Connection: An inconsistent internet connection is another prominent cause of this error. It happens when the download of the iOS update is halted in between (due to a poor connection). Go to your phone's WiFi settings to further diagnose this.
Quick Fixes
● iPhone 8 and Later: Quick-press the Volume Up button first. Let it go and quick-press the Volume Down button. Subsequently, hold the Side button and let it go once the phone restarts.
● iPhone 7/7 Plus: Press and hold the Volume down button and the Sleep/Wake button simultaneously. Keep pressing them until the Apple logo appears.
● iPhone 6, 6s Plus, or iPhone SE: Press and hold the Sleep/Wake button and the Home button simultaneously. When the Apple logo appears, release both buttons.
Connect it to iTunes: In no time, iTunes will automatically detect that your device is in recovery mode and display the setup prompt. Confirm your choice and restore your device to factory settings to fix this.
Quick Fixes
Boot your iPhone in Recovery Mode: You can also take the assistance of iTunes and boot your device in Recovery Mode to resolve this problem. Just connect the iPhone to your computer and open iTunes. Then, forcefully restart your device using the correct key combinations (already listed above). Subsequently, iTunes will detect as soon as your phone boots in the Recovery Mode. When you get the setup prompt, click on the "Restore" button to reset your device.
Quick Fixes
Disable Find my iPhone: Before connecting your device to iTunes, make sure that the Find my iPhone feature is disabled. To do this, go to its iCloud Settings > Find my iPhone and turn off this feature.
Update iTunes: You should use an updated version of iTunes to downgrade iOS 17. Launch iTunes on your system and go to Help > Check for Updates. This will make iTunes check for any available updates.
Quick Fixes
Use a 3rd party tool: If nothing else seems to work, consider using a dedicated iOS repairing tool like Dr.Fone - System Repair (iOS). It can fix all kinds of iOS and iTunes-related issues without causing any harm to your device. Just launch the application and follow a simple click-through process to put your phone out of the loop and downgrade it to a stable iOS version.
Quick Fixes
Obtain your device's SHSH blobs: Connect your iPhone/iPad to your computer and open iTunes. Then, select your device and go to Summary. Next, click on the "Serial Number" field until it displays the ECID number. Now, copy the ECID code and go to any online source to convert it into hexadecimal code. Next, open TSS Saver, and input your ECID and Model Identifier. Finally, click Submit and download your SHSH2 blobs.
Quick Fixes
Quick Fixes