

The ultimate DVD slideshow software to turn your photos and video clips into stunning DVD slideshows with music and 2D/3D transition effects for sharing on TV, YouTube, Facebook, iPod/iPhone/iPad, etc
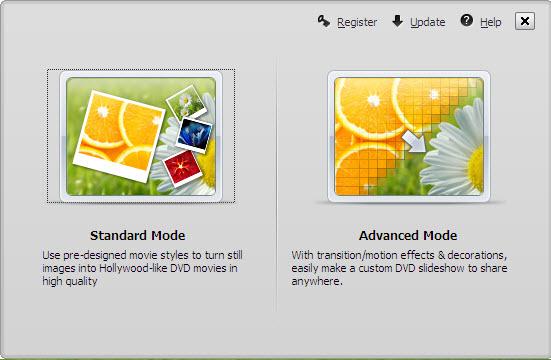
Wondershare DVD Slideshow Builder Deluxe allows you to create a slideshow of your favorite or memorable photos from your collection. Download and launch the slideshow software first. It has two modes: Advanced Mode and Standard Mode. Advanced Mode provides more customization features to make a personalized photo slideshow, while Standard Mode enables you to instantly make a photo movie with ready-to-use movie styles. In addition, the biggest difference is Advanced mode would allow you to import video files, that will boost your creativity.
Click the Register button on the top right corner, and choose the ‘buy now’ option then buy the paid version on the pop up website. Generally, once your order is validated, our system will automatically send you a confirmation e-mail containing the registration code. Then you only need to copy and paste the registration code and licensed email to activate the program.


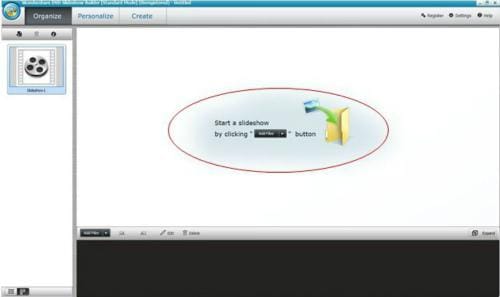
2.1 Navigation bar: you can find all the functions what the project editing needed through the navigation bar, including personalized styles, specific effects and output options.
2.2 Library: The Library indicates the list of your slideshow projects when you are in the organized editing mode. Also, in the personalized editing mode, the library will contain style, clipart, effect, pre-audio, intro/ credit. Moreover, when you click the create button in the navigation bar, you can find the output options in it.
2.3 Preview Window: the Preview Window shows the current video being played on the Timeline or Storyboard.
2.4 Timeline/Storyboard: the Timeline or Storyboard is where you combine the media clips for your slideshow project. You can click to switch between the Timeline and Storyboard view when you are in the personalized editing mode.
If you would like to switch between the Advance and Standard mode, click ![]() the button on the top left corner of the main interface and choose the ‘switch to Standard/Advanced mode’ in the drop down menu.
the button on the top left corner of the main interface and choose the ‘switch to Standard/Advanced mode’ in the drop down menu.
Attention:
You will lose all the video materials when you switch from Advanced mode to Standard mode.
On the other hand, if you switch from Standard mode to Advanced mode, parts of the styles, such as movie, love etc. will be lost as these styles are not interchangeable.
Wondershare DVD Slideshow Builder Deluxe comes with Standard mode and Advanced mode to meet your slideshow editing needs. If you would like to add some video clips and use more kinds of style packs, please choose Advanced mode to start it.
After launching, choose a mode to get started.
Take Advanced mode for example, simply click on the "Add Files" button to bring up the browse window, then select photos/video files. And then, go to Personalize section, you will find the Transition effects have been inserted between every two photos/videos automatically, next you can start editing the slideshow in this section.
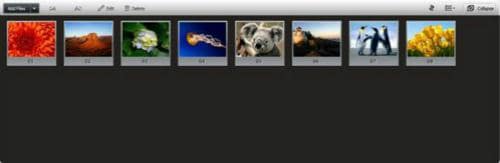
How to sort your photos or videos?
Click the ‘Expand’ button on the top right corner of storyboard, and then click this tag ![]() , and then choose which kind of ways you would like to sort by, such as sort by taken date, modified date, name and random.
, and then choose which kind of ways you would like to sort by, such as sort by taken date, modified date, name and random.
Now, click the "Create" tab and publish your slideshow, and if you want to
Here are some instructions to burn DVD for TV:
We value your privacy and protect your financial and personal data with full encryption and advanced fraud protection.
Knowledgeable representatives available to assist you through instant live chat – any time of day or night.
Try before you buy with a free trial – and even after your purchase, you're still covered by our 30-day guarantee.

Create amazing videos easily using Filmora's wide range of powerful editing tools.

dr.fone Reinventing together. Your ultimate stop for digital solutions.

Get Control Over PDFs Like Never Before.

The Most Powerful Video Converter Ever in the market.
