SSTP VPN: Everything You'd Like to Know

Sep 01, 2023 • Filed to: Latest News & Tactics • Proven solutions
SSTP is a proprietary technology originally developed by Microsoft. It stands for Secure Socket Tunneling Protocol and was first introduced in Microsoft Vista. Now, you can easily connect to an SSTP VPN on popular versions of Windows (and Linux). Setting up SSTP VPN Ubuntu for Windows isn’t too complicated as well. In this guide, we will teach you how to setup SSTP VPN Mikrotik and compare it with other popular protocols as well.
Part 1: What is SSTP VPN?
The Secure Socket Tunneling Protocol is a widely used tunneling protocol that can be used to create your own VPN. The technology was developed by Microsoft and can be deployed with the router of your choice, like Mikrotik SSTP VPN.
- • It uses the Port 443, which is also used by SSL connection. Therefore, it can resolve firewall NAT issues that occur in OpenVPN at times.
- • The SSTP VPN uses a dedicated authentication certificate and a 2048-bit encryption, making it one of the most secure protocols.
- • It can easily bypass firewalls and provide a Perfect Forward Secrecy (PFS) support.
- • Instead of IPSec, it supports SSL transmission. This enabled roaming instead of just point-to-point transmission of data.
- • The only drawback of SSTP VPN is that it doesn’t provide support for mobile devices like Android and iPhone.
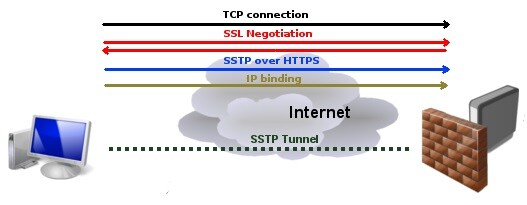
In SSTP VPN Ubuntu for Windows, the port 443 is used as the authentication happens at the client’s end. After obtaining the server certificate, the connection is established. HTTPS and SSTP packets are then transferred from the client, leading to PPP negotiation. Once an IP interface is assigned, the server and client can seamlessly transfer the data packets.

Part 2: How to setup VPN with SSTP?
Setting up SSTP VPN Ubuntu or Windows is a bit different from L2TP or PPTP. Even though the technology is native to Windows, you would need to configure Mikrotik SSTP VPN. You can use any other router as well. Though, in this tutorial, we have considered the setup of SSTP VPN Mikrotik on Windows 10. The process is quite similar for other versions of Windows and SSTP VPN Ubuntu too.
Step 1: Getting the Certificate for Client Authentication
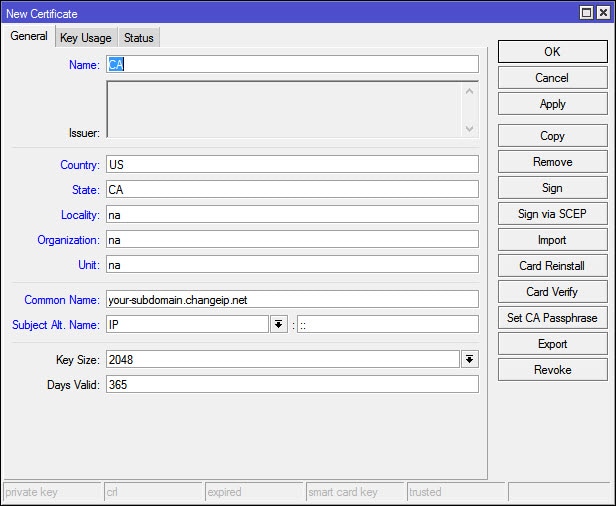
As you know, in order to setup Mikrotik SSTP VPN, we need to create dedicated certificates. To do this, go to System > Certificates and choose to create a new certificate. Here, you can provide the DNS name to setup SSTP VPN. Also, the expiry date should be valid for the next 365 days. The key size should be of 2048 bit.
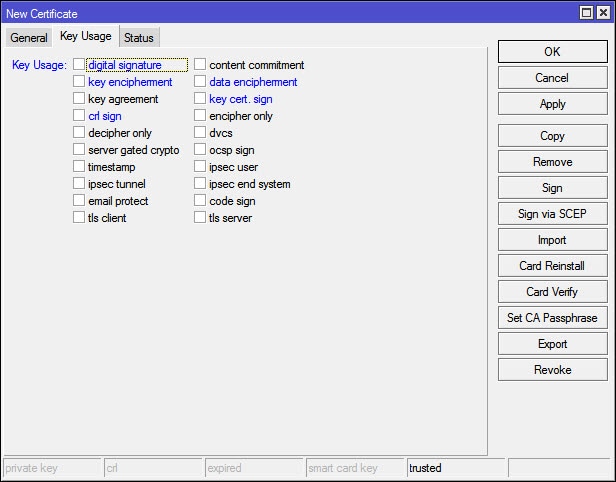
Afterward, go to the Key Usage tab and enable only crl sign and key cert. sign options.
Save your changes by clicking on the “Apply” button. This will let you create the server certificate for SSTP VPN Mikrotik too.

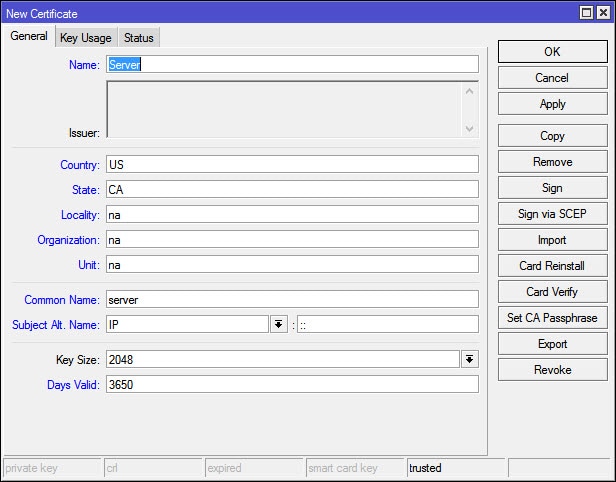
Step 2: Create the Server Certificate
In the same way, you need to create a certificate for the server as well. Give it the appropriate name and set the key size to 2048. The duration could be anything from 0 to 3650.
Now, go to the Key Usage tab and make sure that neither of the options is enabled.
Just click on the “Apply” button and exit the window.
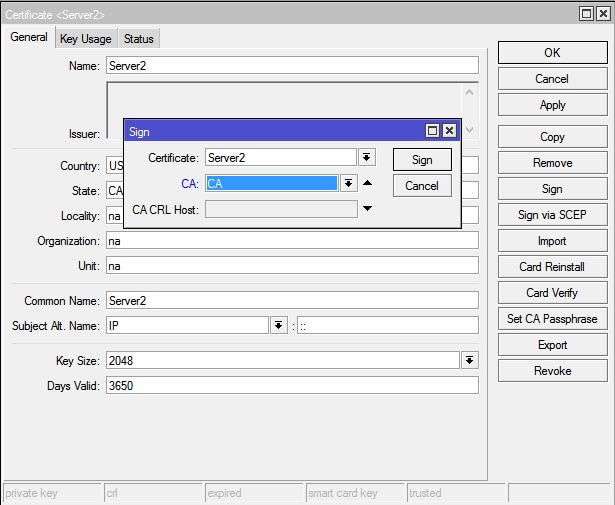
Step 3: Sign the certificate
In order to proceed, you have to sign your certificate by yourself. Simply open the Certificate and click on the “Sign” option. Provide the DNS name or the static IP address and choose to self-sign the certificate.

After signing, you won’t be able to make any changes in the certificate.
Step 4: Sign the server certificate
In the same way, you can sign the server certificate as well. You might need an additional private key to make it more secure.
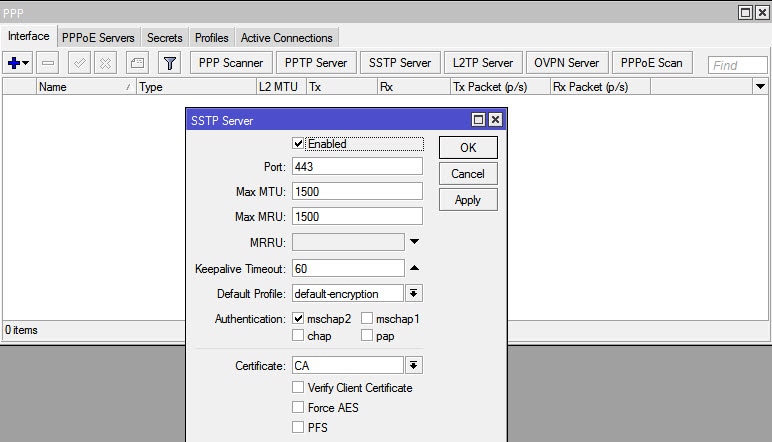
Step 5: Enable the server
Now, you need to enable the SSTP VPN server and create Secret. Simply go to the PPP options and enable the SSTP server. The Authentication should only be “mschap2”. Also, disable the verify client certificate option before saving these changes.
Furthermore, create a new PPP Secret. Provide your username, password and the LAN address of your Mikrotik router. Also, you can specify the IP address of the remote client here.
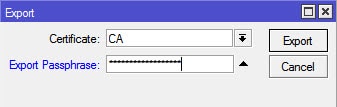
Step 6: Exporting the certificate
Now, we need to export the Client Authentication certificate. Beforehand, make sure that the port 443 is open.
Simply launch the interface of your Router one more time. Select the CA certificate and click on the “Export” button. Set a strong Export Passphrase.
Great! We are almost there. Go to the Router interface and copy-paste the CA certification on Windows drive.

Afterward, you can launch a wizard to Import New Certificate. Select the local machine as the source.
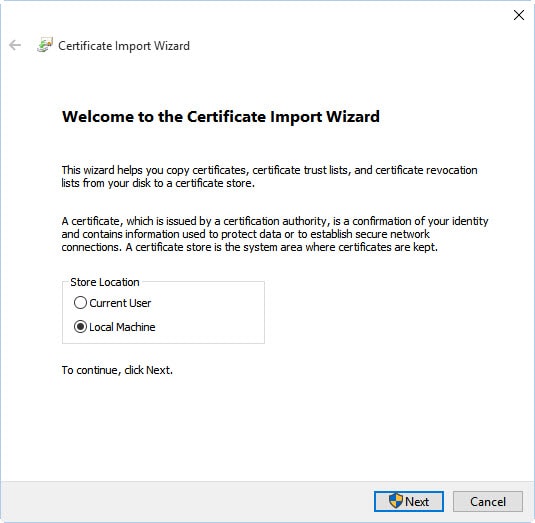
From here, you can browse the certificate you have created. You can also run “certlm.msc” and install your certificate from there.
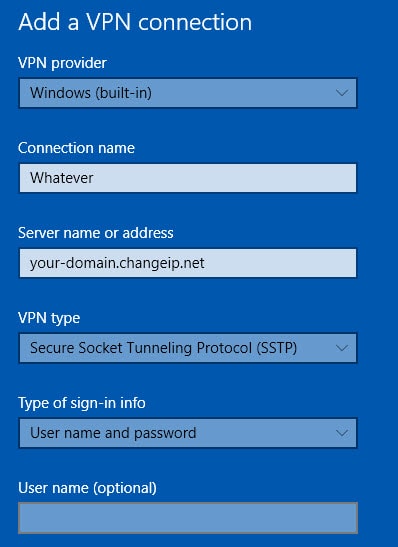
Step 7: Create the SSTP VPN
In the end, you can go to Control Panel > Network and Settings and choose to create a new VPN. Provide the server name and make sure the VPN type is listed as SSTP.
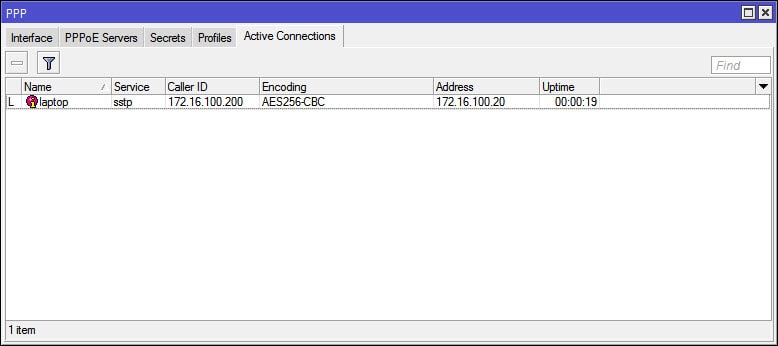
Once the SSTP VPN is created, you can go to the Mikrotik interface. From here, you can view the Mikrotik SSTP VPN that has been added. You can now connect to this SSTP VPN Mikrotik anytime.
Part 3: SSTP vs. PPTP
As you know, SSTP is quite different from PPTP. For instance, PPTP is available for almost all the leading platforms (including Android and iOS). On the other hand, SSTP is native to Windows.
PPTP is also a faster tunneling protocol when compared to SSTP. Though, SSTP is a more secure option. Since it is based on the port that is never blocked by the firewalls, it can easily bypass NAT security and firewalls. The same can’t be applied to PPTP.
If you are looking for a VPN protocol for your personal needs, then you can go with PPTP. It might not be as secure as SSTP, but it is quite easy to setup. There are also freely available PPTP VPN servers.
Part 4: SSTP vs. OpenVPN
While SSTP and PPTP are quite different, OpenVPN and SSTP share a lot of similarities. The major difference is that SSTP is owned by Microsoft and mostly works on Windows systems. On the other hand, OpenVPN is an open-source technology and works on almost all the major platforms (including desktop and mobile systems).
SSTP can bypass all kinds of firewalls, including the ones that block OpenVPN. You can easily configure the OpenVPN service by applying the encryption of your choice. Both, OpenVPN and SSTP are quite secure. Though, you can customize OpenVPN as per the change in your network, which can’t be easily achieved in SSTP.
Additionally, OpenVPN can tunnel UDP and networks as well. To setup OpenVPN, you would need a third-party software while setting up SSTP VPN on Windows is easier.
Now when you know the basics of SSTP VPN and how to setup Mikrotik SSTP VPN, you can easily meet your requirements. Simply go with the VPN protocol of your choice and be sure to have a secure browsing experience.


VPN
- VPN Reviews
- VPN Top lists
- VPN How-tos
James Davis
staff Editor