4 Ways to Transfer Photos from iPhone to Windows 10/8/7

Mar 08, 2024 • Filed to: Manage Device Data • Proven solutions
You all would agree that photos are a big part of life. It gives you the power to preserve and pause your lovely moments for a lifetime. These photos then eventually become the essence of our memories. The most revolutionary part of photo history was the advent of digital photos. Now, people are capable of clicking 100s of photos and keep a copy of all possible electronic devices. Isn't that just amazing? Apart from photos, you may have other files that you want to transfer from iPhone to the laptop.
With so many devices coming into life, it has become difficult to transfer the photos from one media to another. One such case is to transfer photos from iPhone to Windows. It is only natural for users to search for the answer of how to transfer photos from iPhone to Windows. Therefore, this article is here to present you with some of the most viable and reliable solutions to the above-stated problem.
Read on to learn about some of the great software and how you can use them to import photos from iPhone to Windows 7 or higher versions.
Part 1: Transfer photos from iPhone to Windows using Dr.Fone - Phone Manager (iOS)
While there are many methods available in the market to transfer photos from iPhone, but only a few stand up to the mark. One such majestic software is Dr.Fone - Phone Manager (iOS) by Wondershare. Dr.Fone has been the source of pride and confidence for many iPhone users. It comes with tightly knit and highly functional features. This makes Dr.Fone one of the most reputed brands when it comes to handling the problems related to iPhone photos transfer.
Dr.Fone - Phone Manager (iOS)
Transfer MP3 to iPhone/iPad/iPod without iTunes
- Transfer, manage, export/import your music, photos, videos, contacts, SMS, Apps, etc.
- Backup your music, photos, videos, contacts, SMS, Apps, etc. to computer and restore them easily.
- Transfer music, photos, videos, contacts, messages, etc from one smartphone to another.
- Transfer media files between iOS devices and iTunes.
- Fully compatible with iOS 7, iOS 8, iOS 9, iOS 10, iOS 11,iOS 12, iOS 13 and iPod.


Other than that, it also contains other useful features that you love to have in a single pack. Now let us see how to import photos from iPhone to Windows using Dr.Fone - Phone Manager
Step 1: Connect your device to the computer
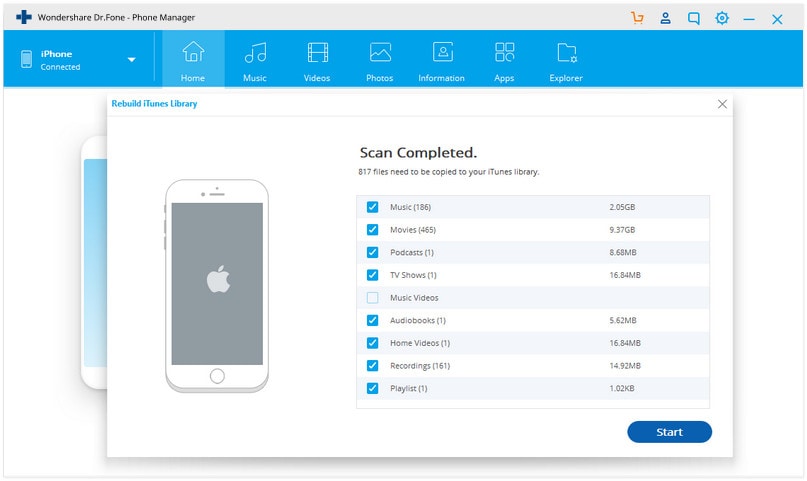
Step 2: Get your official copy of Dr.Fone - Phone Manager (iOS) and install it. Launch the application and you will get to see the following interface

Step 3: Click on the "Phone Manager" and wait for the device name to be shown on the left side of the panel
Step 4: Click on the option that reads " Transfer Device Photos to PC".

Step 5: Dr.Fone will take a few moments to recognize the photos present on the iPhone. Once done, select the required files and initiate the process of transferring the files.
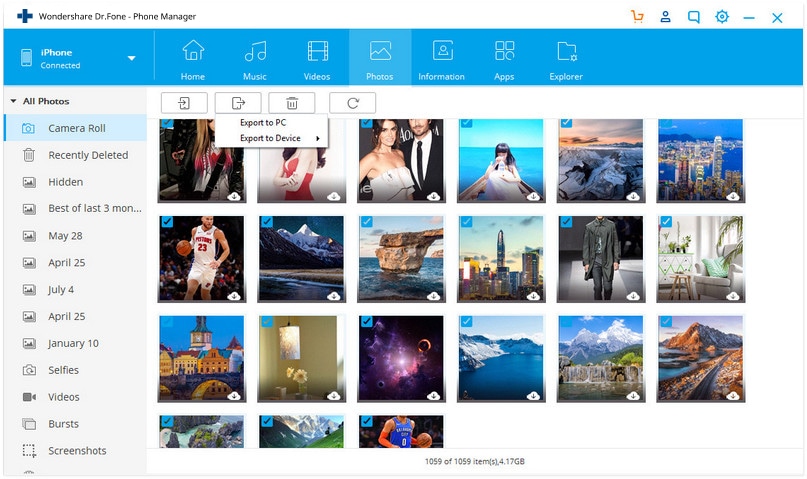
Alternatively, instead of transferring all photos at once, you can also click on the Photos tab on the panel above and select the photos which you would like to import to proceed to export to PC.
Congratulations, you were able to successfully import your photos from iPhone to Windows 7.
Part 2: Import photos from iPhone to Windows 10/8/7 using Autoplay
Autoplay is one of the features introduced by Windows to help get quick access to frequently used options. Although, simple yet it is a powerful option to perform many tedious tasks in few steps, thereby saving your time.
Let us see how Autoplay can help you to transfer photos from iPhone to Windows
1. Import photos from iPhone to Windows 7
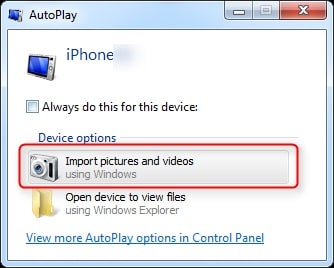
Step 1: Connect your iPhone to the computer. Wait for the Autoplay pop-up to show. Once it appears to click on the option "Import pictures and videos".
Step 2: Go to Import setting link > select the desired folder with the help of drop-down menu beside the import button
Step 3: Add a suitable tag if required, and then click on the import button
2. import photos from iPhone to Windows 8 or higher
Step 1: Connect your iPhone to the system using a cable. Wait for the system to recognize your device.
Step 2: Double-click on the ‘This PC" and then right-click on the iPhone device. Followed by click on the option that reads "Import pictures and videos".
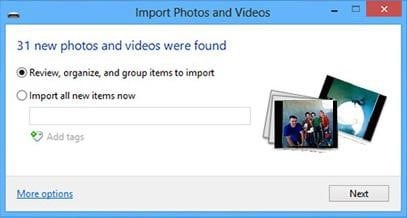
Step 3: Select "Review, organize, and group items to import" option for the first time. For rest, click on "Import all new items now".
Step 4: To select the target folder, click on the more option and choose the desired folder
Step 5: Select your photos and start the import process.
Part 3: Import photos from iPhone to Windows 10 using the Photo app
The photo app in Windows provides an elegant way to view the photos present in your system. But did you know, you can also use the photo app to import photos from iPhone to Windows? Let's follow the article to learn how you can use the app to import your iPhone photos
Step 1: Connect your iPhone to the system using your lightning cable or 30-pin Dock to USB cable.
Step 2: Launch the Photos app application from the Start menu or taskbar. In case, you do not have the app then download it from the Windows Store app
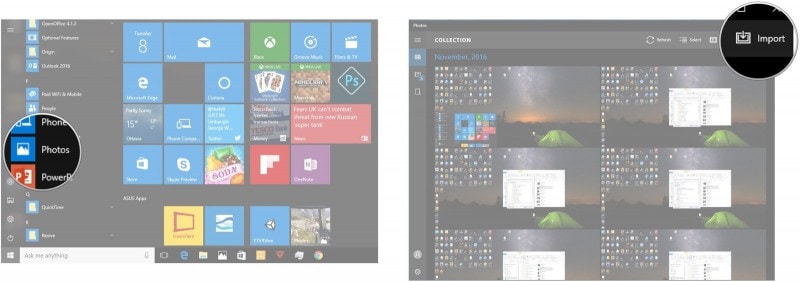
Step 3: On the top-right corner, you will find an option that reads "Import". Click on that option.
Step 4: Choose the device from where you would like to import. By default, all the photos present in the device will get selected for importing. Deselect any photo or photos that you would not like to import.
Step 5: After that, select the button “Continue” to start the import process.
Part 4: Transfer photos from iPhone to Windows using iTunes
iTunes is the all-in-one multimedia hub for the iPhone and other iOS devices. It is, therefore, obvious that iTunes provides some of the tricks to handle multimedia related tasks. Let us see how you can use iTunes to transfer photos from iPhone to Windows
Step 1: Open iTunes. Make sure you have the latest iTunes with you.
Step 2: Connect the iPhone to the computer using a cable.
Step 3: Unlock your iPhone if necessary.
Step 4: Click on the device image on the left-hand side panel and browse through the files to select the photos you want to transfer.
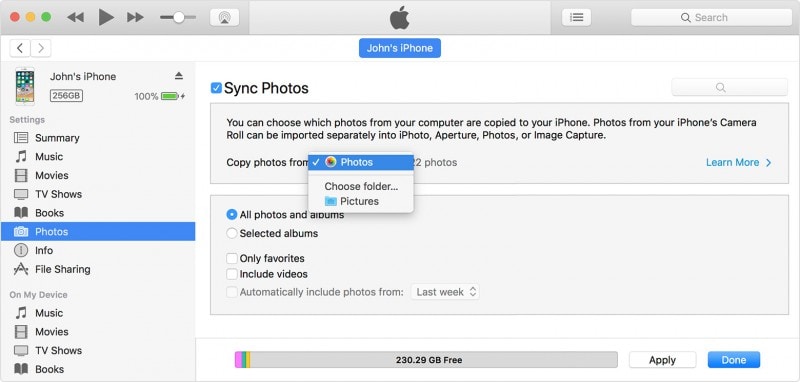
Step 5: Drag the selected files to the iTunes files.
While the article introduces you to some of the ingenious methods to transfer photos from iPhone to Windows it is important to note that only a few of those methods help to achieve the successful transfer every time. Among all the methods, Dr.Fone - Phone Manager (iOS) provides one of the most efficient ways to import photos from iPhone to Windows. Therefore, it is highly recommended to go through the official page of Dr.Fone and learn about the product. For the rest of our users who just want to transfer their pics for a single time, the other options provide a legible and functional plan to help you to solve the problem.


iPhone Photos
- Convert HEIC to JPG
- 1. Convert HEIC to JPG on Linux
- 2. Convert HEIC to JPG Windows
- 3. Best HEIC Converter Online
- 4. Convert HEIC to JPG High Quality
- Export iPhone Photos
- 1. Upload iPhone Photos to Google Drive
- 2. Transfer Photo from iPhone to PC
- 3. Transfer Photo from iPhone to iPhone
- 4. Transfer from iPhone to iPhone
- 5. Transfer from iPhone to iPad
- 6. Move iPhone Photo to External Drive
- 7. Transfer from iPhone to Flash Drive
- 8. Extract Photos from iPhone
- 9. Download Photo from iPhone
- Import Photos to iPhone
- 1. Transfer from Laptop to iPhone
- 2. Transfer Photo from Camera to iPhone
- 3. Transfer Photo from Mac to iPhone
- 4. Transfer Photos from PC to iPhone
- 5. Transfer from iPhone to PC
- 6. Transfer from Android to iPhone
- 7. Transfer from Samsung to iPhone
- Manage iPhone Photos
- 1. Back up iPhone Photos
- 2. Get Photos off iPhone
- 3. Send Large Size Photos from iPhone
- 4. Photo/Video Compressor Apps
- 5. Delete Photos from iPhone/iPad
- 6. iPhone Photos Disappeared Suddenly
- 7. iPhone Photoshop Alternatives
- Recover iPhone Photos
- 1. Restore Deleted Photos from iPhone
- 2. Recover Photos from iPod Touch
- 3. Recover Deleted Picture from iPhone
- Transfer iPhone Photos to Mac
- Transfer iPhone Photos to PC
- 1. Transfer Data from iPhone to PC
- 2. Transfer Photo to Computer
- 3. Transfer Photo to PC without iTunes
- 4. Transfer Library to Computer
- 5. Send Photo from iPhone to Computer
- 6. Import Photo from iPhone to Windows
- 7. Transfer Photo to Windows
- Transfer Photos from Google Drive
- 1. Download from Google Drive to iPhone
- 2. Transfer from Google Photo to iPhone
- 3. Download from iCloud to iPhone
- Transfer Photos to Google Drive
- Image Convert Tips
- ● Manage/transfer/recover data
- ● Unlock screen/activate/FRP lock
- ● Fix most iOS and Android issues
- Learn More Learn More
Alice MJ
staff Editor