Everything You Should Know about iTunes File Sharing

Feb 29, 2024 • Filed to: Mobile Repair Solutions • Proven solutions
iTunes file sharing was added to iTunes with the release of iTunes 9.1. If you are using iTunes 9.1 or later, you can transfer files, created by an app on your iDevice, from your iDevice to your computer. Suppose you have created a file with Pages on your iPad. You can copy this file from your iPad to your computer. Later, you can use Pages for Mac OS X to open this file on your PC. Here, we will also introduce a way to share your files to your device in one click, even if you are use the old version of iTunes.
-
Part 1. How to Find File Sharing on iTunes
-
Part 2. What Apps can Use iTunes File SharingApps
-
Part 3. What Are the Advantages and Disadvantages about iTunes File Sharing
-
Part 4. How to Share iTunes Music in One Click
-
Part 5. How to Use File Sharing in iTunes
-
Part 6. How to Find the iTunes File sharing Folder after Sharing
- Part 7. Five Most-asked Questions about iTunes File Sharing

Part 2. What Apps can Use iTunes File Sharing
Not all the apps in iDevice support file sharing. You can check this by connecting your iDevice with the computer and run iTunes. Click your iDevice under DEVICES and the click App tab on the right panel. In the file Sharing section of iTunes you will find a list of apps that support file sharing. Any app that is not in this list does not support file sharing.
Part 3. What Are the Advantages and Disadvantages about iTunes File Sharing
Advantages of iTunes File Sharing:
- File sharing in iTunes works with USB. Just plug and play.
- No Syncing with the iDevice required.
- No quality loss.
- Sharing files with iTunes file sharing is easy and simple.
- It will preserve all the metadata.
- No limit with the number of files transferred or with the size of the files.
- Enable to do iTunes file sharing on iPhone, iPad and iPod touch.
- You can share file from PC to iDevice and vice versa.
Disadvantages of iTunes File Sharing
- Not every app on the iDevice support iTunes File Sharing feature.
- Even not all iDevice support iTunes File Sharing feature. As for example, iDevice with the version prior to iOS 4 does not support iTunes File Sharing feature.
Part 4. How to Share iTunes Music in One Click
The environment of iTunes is full of complex options. Finding related options and carrying out file sharing may be a little complicated for beginners. But most of us are busy every day and do not have time to carefully research how iTunes functions. But this by no means indicates that you cannot share iTunes music easily.
Dr.Fone - Phone Manager (Android)
One-Click Solution to Share iTunes Music with Android
- Transfer iTunes to Android (vice versa).
- Transfer files between Android and computer, including contacts, photos, music, SMS, and more.
- Manage, export/import your music, photos, videos, contacts, SMS, Apps etc.
- Manage your Android device on computer.
- Fully compatible with Android 8.0.


Note: If you want to share iTunes music with iOS devices, use Dr.Fone - Phone Manager (iOS) to do the job. The operations are similar to those on Dr.Fone - Phone Manager (Android).
The following lists the simple steps by which you can share iTunes music with Android:
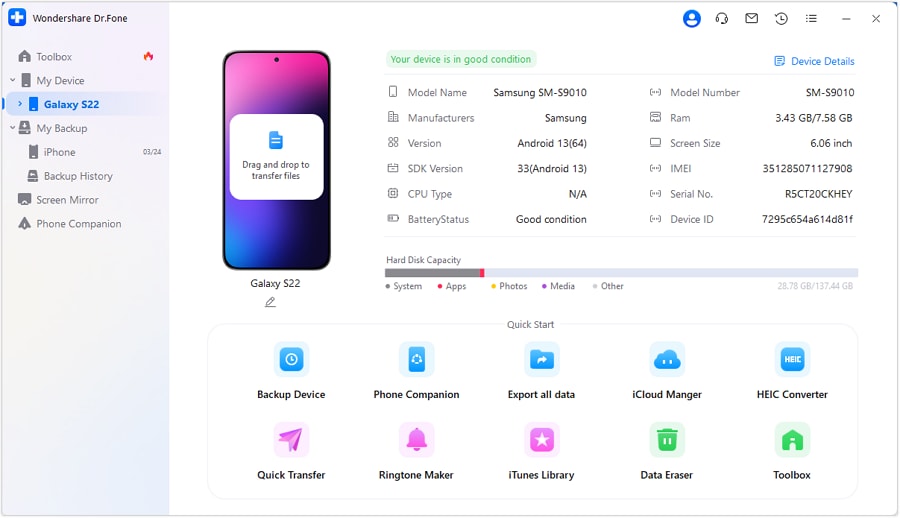
Step 1: Download and install Dr.Fone, and connect your device to the PC. After starting this tool, you can see the main interface where the option "Transfer" should be clicked.

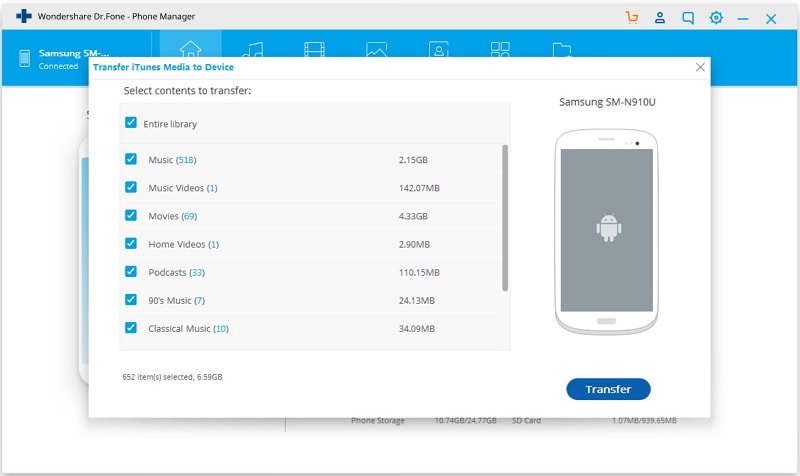
Step 2: A new window will appear. In the middle, you can select the option "Transfer iTunes Media to Device".
Step 3: Then you can see all the transferrable file types listed. To share the iTunes music, just select "Music" and deselect other options, and then click "Transfer".
Part 5. How to Use iTunes File Sharing to Transfer File
In this section we will learn how to transfer file from iDevice to computer and from computer to iDevice using iTunes file sharing. To complete this section you will need the following things:
- The latest version of iTunes. It's free. You can download this from Apple's official website.
- Mac OS X v10.5.8 or Later or if you are a Windows user you will need Windows XP, Windows Vista, Windows 7 or Windows 8.
- An iOS Device with the version iOS 4 or later.
- An iOS App that supports File Sharing.
1. Transfer Files from iDevice to Computer
Step 1: Download and install the latest version of iTunes if you have not already done this.
Step 2: Connect your iDevice with your computer by using the dock connector that comes with your iDevice to USB cable.
Step 3: Launch iTunes if it is not already running on your computer. You might see a picture like below:
Step 4: Select your iDevice from the DEVICES section at the left of the iTunes.

Note: If you can't find the left sidebar, select View from the iTunes menu bar and click on the Show Sidebar.
Step 5: Click on the Apps tab and scroll down to the bottom of the page where you will find a section labeled as File Sharing. See the screenshot below:

Note: If you do not see any section labeled as File Sharing then none of the app on your iDevice support file sharing.
Step 6: Here, you will find a list of application on your iDevice that supports the File Sharing feature of iTunes. Select any of the apps on the left side to see the files associated with that app on the right side Documents list.

Step 7: Select a file from the document list. You can transfer that file either by dragging and dropping or by clicking on the Save to… button.
Step 8: To drag and drop, you can select that files and drag that file to a folder or window on your computer and drop that in it.
Step 9: To use the second method, click on the Save to… button and locate to the folder of your computer where you like to save that file. Then click on the Choose button to save that file.

2. Transfer Files from Computer to iDevice via iTunes file sharing
Step 1: Download and install the latest version of iTunes if you have not already done this.
Step 2: Connect your iDevice with your computer with a USB cable.
Step 3: Run iTunes. You'll see a screenshot below:
Step 4: Click your iDevice from the DEVICES section at the leftside bar of the iTunes.
Note: If you can't find the left sidebar, click View from the iTunes menu bar and click Show Sidebar.
Step 5: Click on the Apps tab and scroll down to the bottom of the page where you will find File Sharing section. See the screenshot below:
Note: If there is no section labeled as File Sharing, it means none of the app on your iDevice can do file sharing.
Step 6: Here, you will find a list of app on your iDevice that supports the File Sharing feature of iTunes. Choose an app on the left side to see the files associated with that app on the right side Documents list.
Step 7: You can transfer files from computer to iDevice either by dragging and dropping or by clicking on the Add button.
Step 8: To drag and drop, select that files on your computer and drag that file to the Document list section of iTunes and drop that file there.
Step 9: To use the second method, just click on the Add button and locate the file on your computer. Then click on the Open button to add that file to your iDevice.

Part 6. How to Find the iTunes File sharing Folder?
Just use iTunes file sharing feature, but now don't know where to get the shared files? Don't worry. You can follow the tips below.
When you transfer files from computer to your iDevice:
1. Access the iTunes file sharing section in iTunes to find the files you want are under what app.
2. Then, on your iDevice, find and run the same app. You'll find the shared files are right there.
When you transfer files from your iDevice to computer:
You can choose any save path to save the shared files. If you're afraid that you might forget the save path, you can just save them to desktop.
Part 7. Five Most-asked Questions about iTunes File Sharing
Q1. After clicking 5 times or more on any of the apps sometimes no other files appear in the Document section?
Answer: Apple has not yet fixed this problem. So far, the only solution is to restart iTunes.
Q2. You can only see the files associated with an app only once. For more clarification, suppose, you connected you iDevice with iTunes and selected an apps, say Stanza, and saw the files associated with Stanza on the Document section. However, after checking other app's file when you will return to Stanza you might not find the files in the Document section?
Answer: Apple has not yet fixed this problem. So far, the only solution is to restart iTunes.
Q3. Sometimes you might face problem with video issues if you are using windows?
Answer: Try to upgrade DirectX.
Q4. The antivirus software installed on your computer might create problem in transferring file.
Answer: Update or disable or remove antivirus software from your computer.
Q5. There might be a lot of problem related to iPod or iPhone while you are trying these iDevices for file sharing?
Answer: Try to reset or reboot your iPod or iPhone. Sometimes, updating the firmware solves the problem.


iTunes Manage
- iTunes Backup
- 1. Does iTunes Backup Photos
- 2. Forgot iTunes Backup Password
- 3. Fix iTunes Corrupt Backup
- 4. Fix iTunes Backup Session Failed
- 5. Change iTunes Backup Location
- 6. View Files on iTunes Backup
- 7. Backup WhatsApp Using iTunes
- 8. Top 5 iTunes Backup Managers
- 9. Top 6 Free iTunes Backup Extractor
- 10. Backup iMessage Without iTunes
- iTunes Restore
- 1. Restore Photos from iTunes Backup
- 2. Restore Data from iTunes Backup
- 3. Restore WhatsApp Using iTunes
- iTunes Rebuild
- 1. Transfer iPad Purchases to iTunes
- 2. Transfer iPad Music to iTunes
- 3. Transfer iPod Music to iTunes
- 4. Transfer Android Music to iTunes
- 5. Import Multiple Lyrics to iTunes
- iTunes Transfer
- 1. Sync iTunes Media to iCloud
- 2. Sync iTunes Media to Android
- 3. Transfer iTunes Music to iPod
- 4. Transfer iTunes Music to Flash Drive
- 5. Transfer iTunes Music to Android
- 6. Transfer iTunes Music to Google Play
- 7. Put iTunes Audiobooks to Android
- 8. Copy iTunes Playlists to Hard Drive
- 9. Move iTunes Library to PC / Mac
- 10. Export iPhone Contacts from iTunes
- 11. Export Playlist from iTunes
- iTunes Plugins/Alternatives
- 1. Top 3 iTunes Plugins
- 2. Top 20 Alternatives to iTunes
- 3. Top 3 iTunes Alternatives for Android
- 4. Top 5 iTunes Remote for Android
- iTunes Problems
- 1. Fix iTunes Error 11
- 2. Fix iTunes Error 1100
- 3. Fix iTunes Error 2005/2003
- 4. Locked Out Of iTunes
- 5. Forgot iTunes Password
- 6. Account Has Been Disabled in iTunes
- iTunes Tricks
- 1. Change the iTunes Skin
- 2. Use File Sharing in iTunes
- 3. Use Home Sharing in iTunes
- 4. Recover iPhone Data from iTunes
- 5. See iTunes Purchase History
- 6. Get Free iTunes Cards Legally
- 7. iTunes Visualizers Download
- 8. Watch iTunes Movie on Android
- 9. Update iTunes On Your Computer
- 10. Install iTunes on Windows / Mac
- ● Manage/transfer/recover data
- ● Unlock screen/activate/FRP lock
- ● Fix most iOS and Android issues
- Manage Now Manage Now Manage Now
James Davis
staff Editor