Dr.Fone User Guide for Data Eraser
Learn how to use Data Eraser to erase mobile device data permanently and completely to protect your privacy. Download the latest version of Dr.Fone and get started now.
How To Erase Private Data From iOS Device?
The Erase Private Data function for iOS can help you wipe personal data, such as contacts, messages, call history, photos, notes, calendars, Safari bookmarks, reminders, etc. Moreover, you can also select only the deleted data for permanent erasure. Everything is completely erased and won't be recovered again.
Manage Your Phone Wherever You Go
Download and install the latest version of Dr.Fone - Data Eraser (iOS) on your computer and launch it. Continue to connect your iOS device to the computer and redirect to select Data Eraser from the available options.

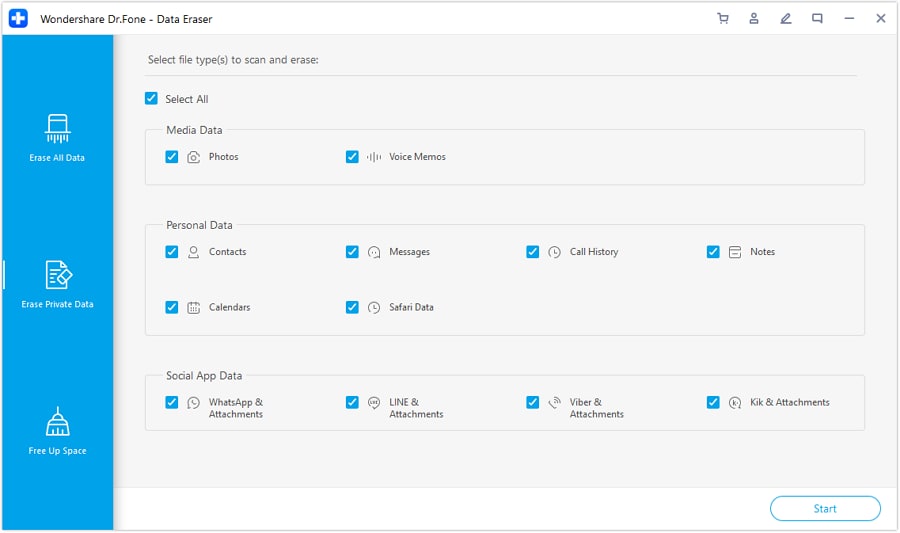
Select Erase Private Data from the left panel and observe a list of data types that come under private data.
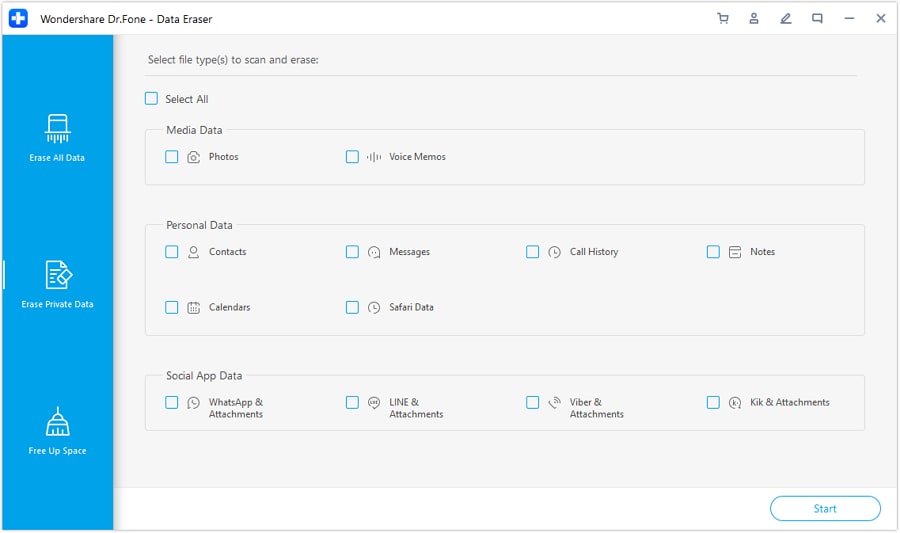
Checkmark all data types that you wish to erase from the iPhone and continue to click Start on the bottom-right of the screen.
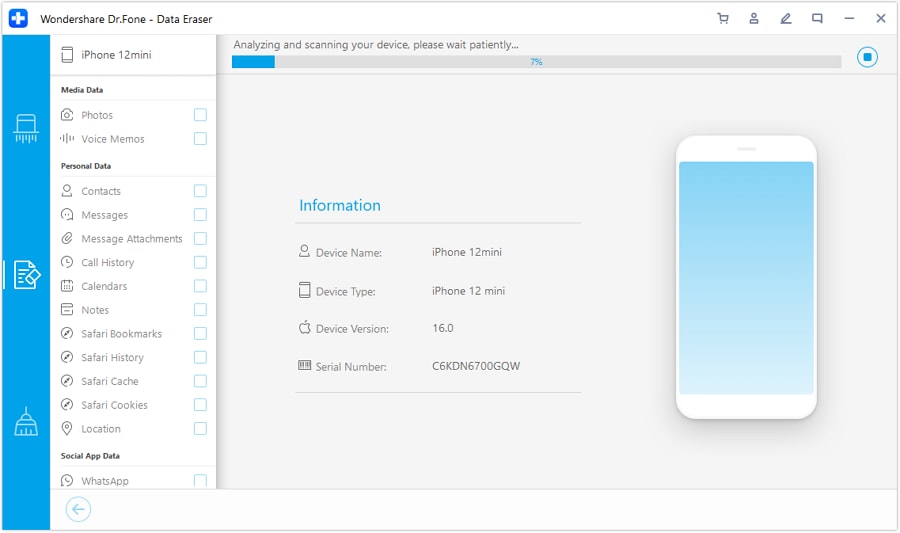
The screen then continues to analyze and scan all the data that is to be erased from the iDevice.
Once done, you can preview the data on the screen in your front and navigate through the categories from the left panel.
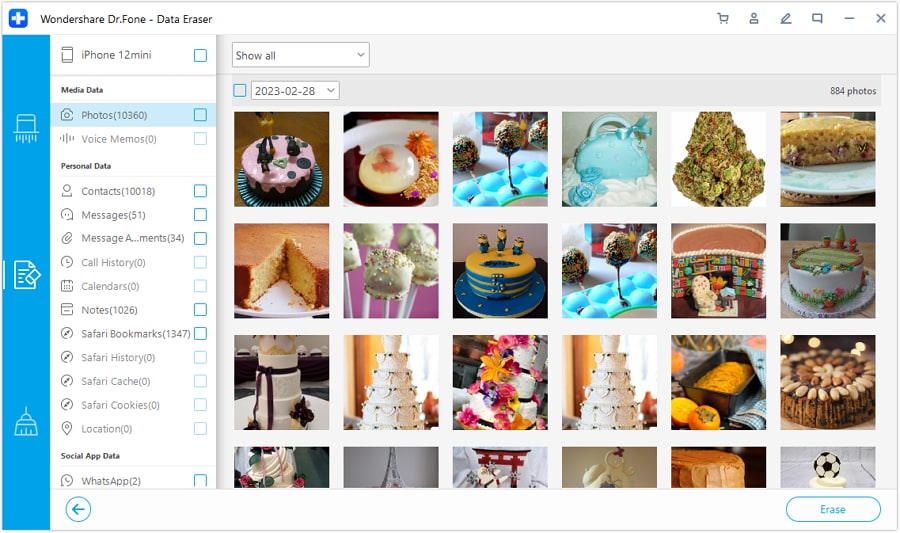
If you wish to preview specific content, select the drop-down on the top and select either option of Select all or Only Show the deleted. Continue to select the Erase button on the bottom-right of the screen to initiate the process.

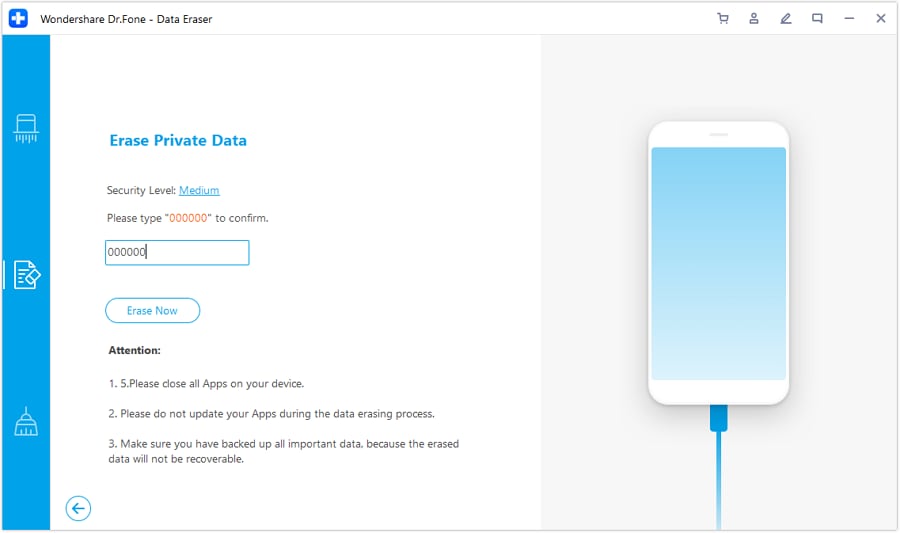
To confirm the operation, you will have to type in the confirmation code, select the respective Security Level, and continue to select the Erase Now button.
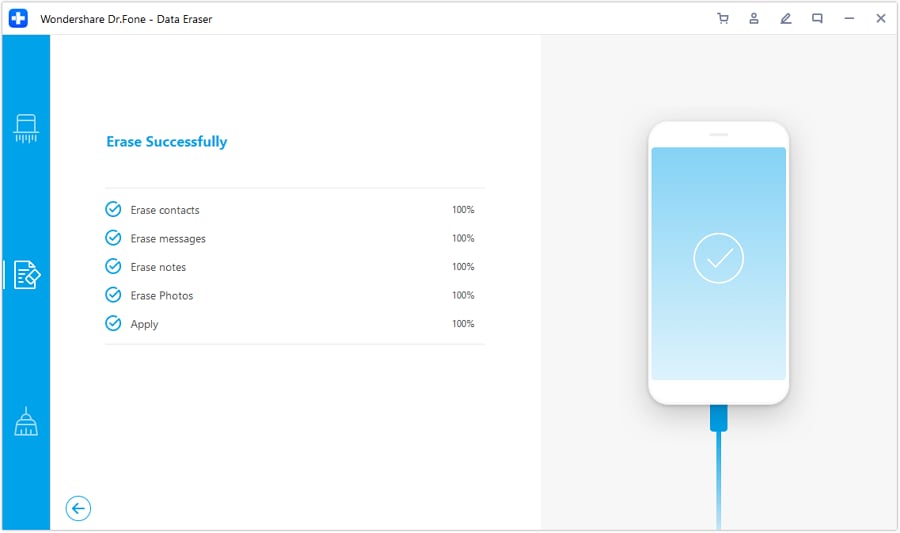
The final window will display the completion of the process. You will successfully erase iOS private data from your iDevice.
Need help?
You might find the answer to your question in the FAQ or additional information below: