Useful Trick to Selectively Restore iTunes Backup Content to iPhone 13
iPhone 7 to 8 Series
- iPhone 7 Problems
- 1. iPhone 7 Problems
- 2. Screen Record on iPhone 7
- 3. iPhone 6/7 Touch ID Not Working
- 4. Activate iPhone 7 Plus/7/SE(No SIM)
- 5. iPhone 6/7/8 Stuck On Apple Logo
- iPhone 7 Series Tips
- 1. Screen Mirroring iPhone 7/7 Plus
- 2. DFU Mode in Apple iPhone 7/7 Plus
- 3. Factory Reset iPhone 7/7 Plus
- iPhone 7 Transfer
- 1. Restore iCloud Backup to iPhone 7
- 2. Restore iTunes Backup to iPhone 7
- 3. Transfer from iPhone 7 to iPhone 8
- iPhone 7 Unlock
- iPhone 8 Problems
- 1. iPhone 6/7/8 Won't Turn On
- 2. iPhone 6/7/8 Black Screen
- 3. Siri Not Working On iPhone
- 4. Turn Off Find My iPhone
- iPhone 8 Series Tips
- 1. Delete Apps on iPhone 8
- 2. Enter & Exit DFU Mode On iPhone 8
- 3. Screen Mirror on iPhone 8/8 Plus
- 4. Screen Record on iPhone 8/8 Plus
- 5. Recover Deleted Message on iPhone 8
- 6. Sell iPhone 8/8 Plus
- 7. Hard/Soft/Factory Reset iPhone 8
- 8. iPhone 8 Tips and Tricks
- iPhone 8 Transfer
- 1. Transfer from iPhone 5S to iPhone 8
- 2. Transfer from iPhone 6 to iPhone 8
- 3. Back up iPhone 8
- 4. Back up Locked iPhone Data
- iPhone 8 Unlock

Feb 29, 2024 • Filed to: Data Recovery Solutions • Proven solutions
Isn't the iPhone 13 amazing? You are itching to get it and in your preparation, you have backed up your current iPhone. The thing is, you do not want everything that has been backed up but does not know how to restore backup files into a new iOS device selectively. If you ask someone from the Apple store, you will probably be told that it is impossible.
What if I tell you that it is actually possible? Intrigued? Here is how you can do it.
Part 1: Seletively restore iTunes backup to iPhone 13
Selective restoration is possible with Wondershare Dr.Fone - Data Recovery (iOS). This sophisticatedly-designed data recovery tool is the first of its kind and has one of the highest recovery rates in the market.
Here are some of its great key features:
- Restore and recover photos, videos, contacts, messages, notes, call logs etc. from iTunes Backup.
- Fully Supports iPhone and latest iOS etc.
- Able to preview and selectively recover what you want into your new iOS device from any iPhone, iTunes or iCloud backup.
- Export items in you iCloud backup onto your computer.
Dr.Fone - Data Recovery (iOS)
World's 1st iPhone and iPad data recovery software
- Provide with three ways to recover iPhone data.
- Scan iOS devices to recover photos, video, contacts, messages, notes, etc.
- Extract and preview all content in iCloud/iTunes backup files.
- Selectively restore what you want from iCloud/iTunes backup to your device or computer.
- Compatible with latest iPhone models.


Now that you know what tool to use, here is how to perform iPhone selective restoration with an iTunes backup:
Step 1: Select Recovery Mode
Open Wondershare Dr.Fone on your computer and click the Recover from iTunes Backup File option. The software will detect all of the iTunes backup files that you have on your computer. It will show you in the window to confirm the files you want to restore on your iPhone 13.
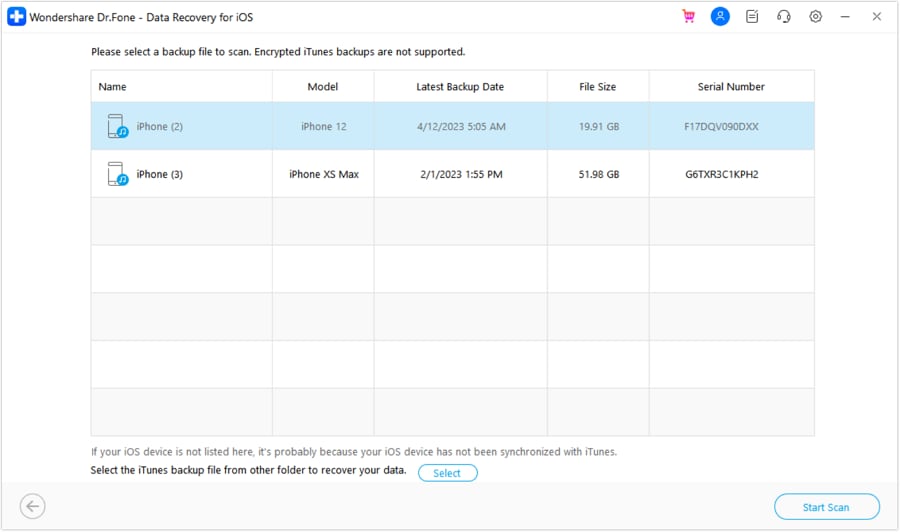
Step 2: Scan data from iTunes Backup File
Select the iTunes backup file that has the data that you want to recover. Click the Start Scan button---it will take some time to extract all data from the iTunes backup file. It will take a longer time if it is a bigger file.
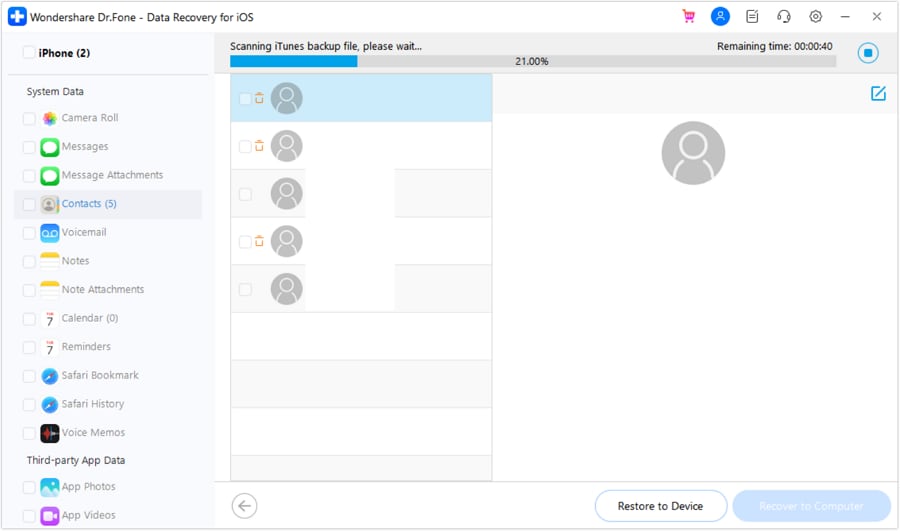
Step 3: Preview and recover
Once the software completed its scanning, you will see all the files contained in the backup file. Highlight the file to see what is contained in it before selecting it for recovery. If you know the file's name, you can easily search for it in the search box in the result window.

Selectively check the boxes next to the files that you want to recover. Hit the Recover button at the bottom of your screen.
IMPORTANT: Ensure that the connection between your device and computer is not interrupted during the selective restoration process.
Part 2: Other useful trick about restoring iTunes backup content
Tip #1
Did you know that you can make your iTunes backup content much safer? You can encrypt your backup files to prevent hackers or intruders from accessing your private data. Here is how:
- Connect your device to your computer and launch iTunes.
- When iTunes has detected your device, go to the Summary tab and click on Options.
- Check theEncrypt iPhone backupbox.
- Enter the password and click Set Password. Your iTunes backup file is now encrypted.
Tip #2
If you have limited amount of storage space, minimize the amount of app data you backup. Here is how:
- Open your iPhone's Settings, tap on iCloud and then Storage.
- Click the Manage Storage option and click on your device (if you have multiple devices).
- You will now see a list of apps under the backup options---disable the ones that are the least important to you.
- Select Turn off and delete.
Tip #3
There is a simpler way to backup your apps using iTunes:
- Go to File > Devices > Backup.
- This will automatically backup content that is currently on your iPhone.
Tip #4
If you have been a loyal iPhone user, you will probably have a tonne of iTunes backup files on your computer. Delete them. It is to avoid confusion and it will make your computer sigh relief.
Tip #5
If you are using a Windows computer, your iTunes backup file will be here: Users(username)/AppData/Roaming/Apple Computer/MobileSync/Backup.
Tip #6
The default path to your iTunes backup files is Users/[Your user name]/Library/Application Support/MobileSync/Backup for the Library.
Tip #7
To change the destination of your iTunes backup files, follow these steps:
- Create the new destination folder where you want it to be located.
- Enter your computer as an administrator and enter the following command: mklink /J “%APPDATA%Apple ComputerMobileSyncBackup” “D:Backup”. Backup is the name of your new folder.
Tip #8
If you plan to backup and upgrade to iOS 9, using iTunes is your best bet to use iTunes, which will give you a more comprehensive backup. This is simply because your computer will be able to do it much faster than your iPhone could.
Tip #9
This tip if for people who has multiple iOS devices. You can copy and consolidate content into different iOS in three ways: from iOS devices to iTunes, from iPhone/iPod/iPad to Mac and from iTunes to computer.
Tip #10
Like everything else in your life, it would be better if your iTunes library is organised---you would not want to endlessly scroll down your library to find the backup file that you want, would you? To make your iTunes library more organised, launch iTunes on your computer. Open Preference and click on Advanced Check the boxes next to Keep iTunes Media folder organised and Copy files to iTunes Media folder when adding to library. Click the OK button.
Now, the next time someone says to you that iPhone selective restoration is impossible, direct them to this article. There is definitely a way around this Apple limitation and it should be shared as widely as possible. Good luck! I hope that this article answered your questions about selective restoration and convinced you that it is easy to do by yourself.


Alice MJ
staff Editor