Dr.Fone User Guide for Whatsapp Transfer
Learn how to use Dr.Fone to transfer WhatsApp & WhatsApp Business between your iOS/Android devices and computers. Backup and restore your WeChat, LINE, Kik, and Viber on iOS. Download the latest version of Dr.Fone and get started now.
How To Backup and Restore WhatsApp on iOS?
Backups are considered an important element in data protection. Many data protection techniques consider the usage of backups as a necessity before performing any actions. Although iOS devices keep all data protected through iCloud, there's always room for more. The need to have a separate entity holding WhatsApp data backup is important, which is covered by Dr.Fone - WhatsApp Transfer in this guide.
Backup and Restore WhatsApp on iOS
As we follow through the process, iOS devices can easily back up their important WhatsApp data with the help of the WhatsApp Transfer tool offered by Dr.Fone. This unique utility provides the simplest of operations while giving you complete control over the data that is to be backed up. Follow through the comprehensive steps to backup and restore WhatsApp on your iOS device:
Start by launching Wondershare Dr.Fone on your computer and proceed under the navigation Toolbox > WhatsApp Transfer to launch the particular tool.

* The Dr.Fone Mac version still has the old interface, but it does not affect the use of the Dr.Fone function. We will update it as soon as possible.
On opening the tool on another window, you need to navigate from WhatsApp > Backup WhatsApp messages to initiate a backup for your existing WhatsApp data on your iDevice.

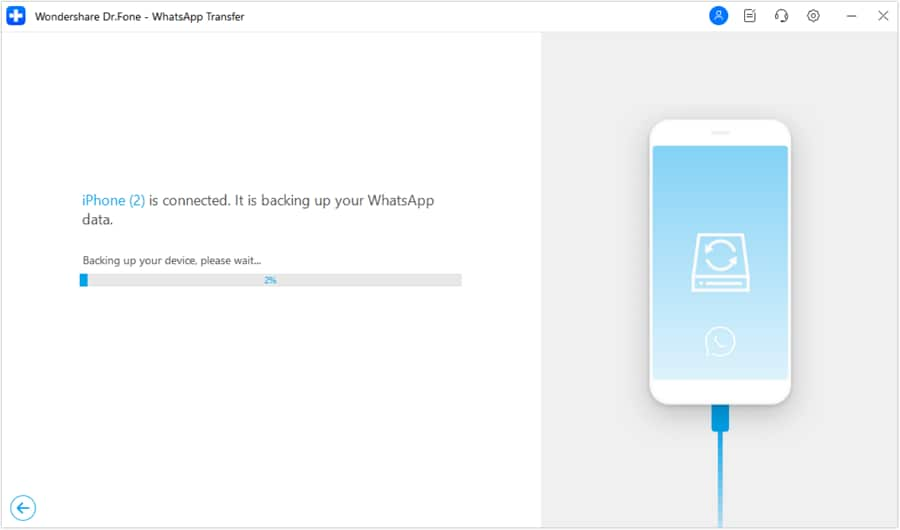
As the process starts, the progress is displayed on the next screen to help the user keep track of it.
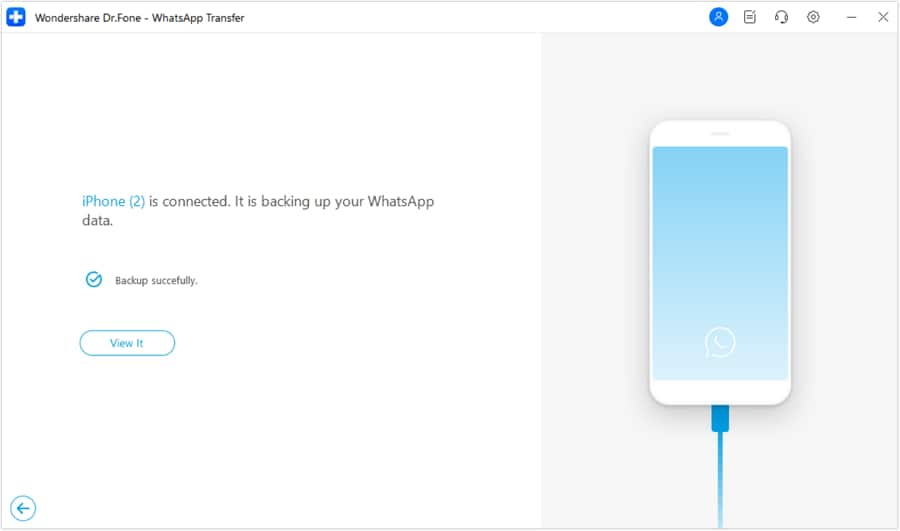
Once the data is backed up, a clear message comes in the display, showing the success of the process. To view the backed-up data, click View It to open it on another window.
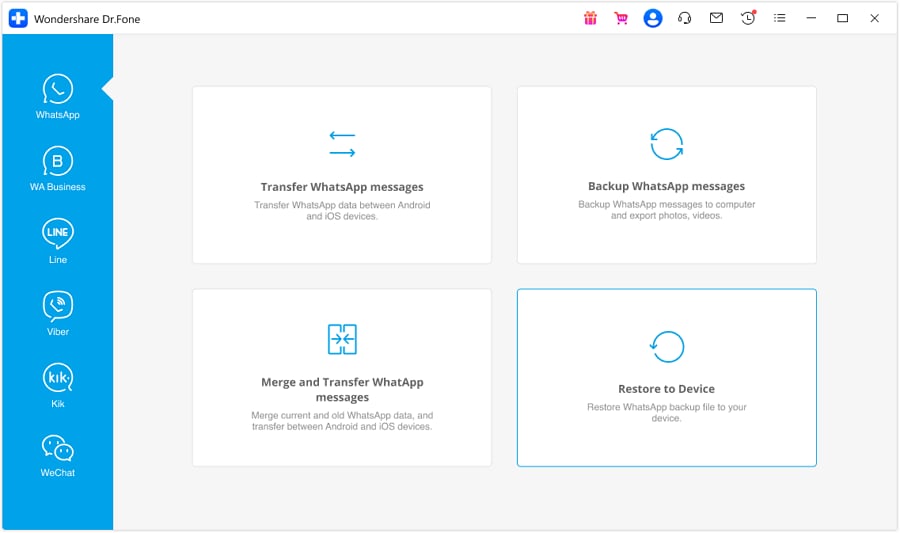
However, if you wish to restore the WhatsApp data back to your iOS device at any instant, navigate through this path: WhatsApp > Restore to Device to open the restoration process on a new window.
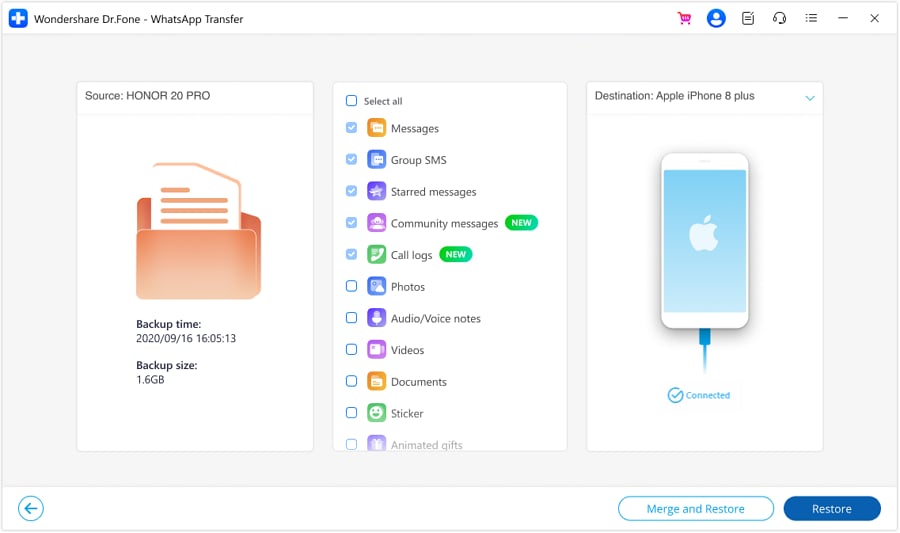
The backup files are displayed on the next screen, giving you an idea of the data that the platform holds. Locate your respective iDevice's data and continue to click the View button adjacent to the file details.

The entire WhatsApp backup file comes in a preview on the next screen, with proper categories in the display. Select any particular category and view specific chats, media, and related content on the preview window. To restore the data back to your iDevice, select the Restore to Device button on the bottom-right of the screen.
The next screen prompts the restoration process, which can be started by clicking the Restore button.

Before you get going with the process, make sure to back up the previous WhatsApp data in the iDevice, as this process will delete it. If you wish to back up the data, click Backup. However, to continue with the process, press Continue and initiate restoration.

The next window displays the progress of data restoration. If you wish to abort the process, click Cancel.

A prompt window opens on the screen asking you to turn off the Find My iPhone feature on your iDevice. Follow the on-screen instructions by opening the Settings of your iPhone and selecting the name present on the top of the screen.
Continue into the Find My section to open the respective settings. On the next screen, turn off the toggle for the Find My iPhone option. Once you have done it, click OK on your computer's screen.

On completing the instructions, the restoration process concludes, and a prompt message appears showing the completion of the process. Click OK to conclude the entire operation.

WHAT YOU'LL NEED

Dr.Fone provides a complete set of tools for solving all iOS/Android phone problems.
Need help?
You might find the answer to your question in the FAQ or additional information below: