Dr.Fone User Guide for Dr.Fone Basic
Learn how to use Dr.Fone to manage, backup, and mirror your mobile devices on the computer. Download the latest version of Dr.Fone and get started now.
How To Export Data From Your Device With Dr.Fone?
Do you have some data on your smartphone that you wish to back up on the computer? While this can be the perfect way to back up the content, it might get difficult to manage if done manually. This is where Dr.Fone turns out to be of great help to users. This guide below will show you a comprehensive way to export data from smartphones using Dr.Fone.
How To Export Data From iOS to Computer?
Start by connecting your iOS device to the computer using a USB connection. As the device is detected successfully, its details are displayed on the home screen. Continue to select the Export all data button in the Quick Start section.

* Dr.Fone Mac version still has the old interface, but it does not affect the use of Dr.Fone function. We will update it as soon as possible.
As this opens a new screen on the front, select the file types you want to export in the process. Checkmark all the data types and click Export on the bottom of the screen to initiate the process. Select the location where you want to save your exported data.

Following this, you will be asked to set up an encrypted password for the backup that will be saved on the computer. Set a password, confirm, and click Done to execute the process.

The iOS device will start to export its data to the computer through Dr.Fone. The progress of this operation will be displayed on the screen.

As the data is successfully exported, the window prompts on your computer’s screen. Click Open to view the exported data on the specified location.

How To Export Data From Android to Computer?
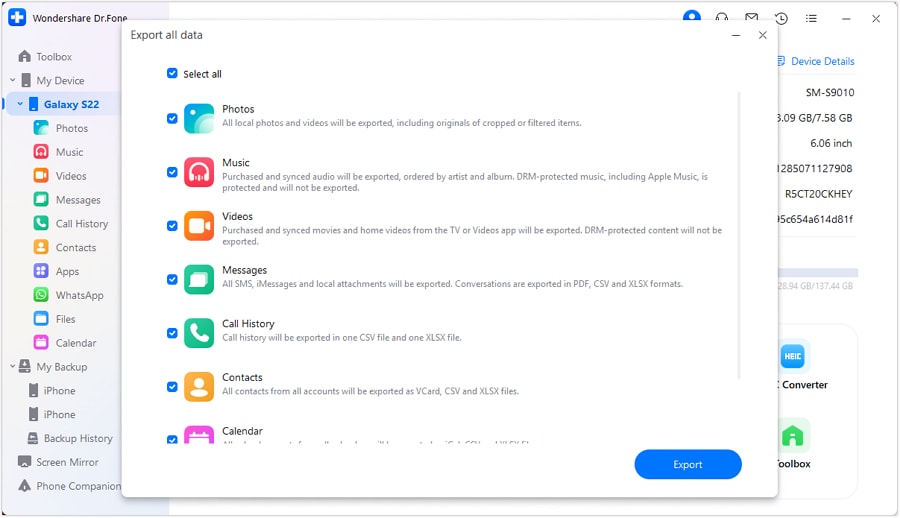
Connect your Android device using a USB cable and let it be detected on Dr.Fone. As it is detected, lead to select the Export all data option on the bottom of the home screen.

Following this, you will have to select all the file types that you want to export in this operation. You can export your photos, music, videos, messages, call history, contacts, calendar, and application data. On specifying the data, click Export and set up a location for the exported data on the computer.
The process starts and can be viewed through the progress bar appearing on the computer’s screen.

Once the data is exported, it is displayed on the computer screen. Click Open to view the location of the exported data from the Android device.

WHAT YOU'LL NEED

Dr.Fone provides a complete set of tools for solving all iOS/Android phone problems.
Need help?
You might find the answer to your question in the FAQ or additional information below: