How to Access iCloud Photos: Step-By-Step Guide

Sep 04, 2023 • Filed to: Manage Device Data • Proven solutions
Many iPhone users overlook the importance of iCloud in their devices. In fact, storing photos on iCloud offers a multitude of conveniences that significantly enhance your digital life.
One of the most noteworthy advantages is the automatic backup feature. When you enable iCloud Photo Library, your photos and videos are automatically and continuously backed up to the cloud. This safeguard ensures that your cherished memories remain safe and easily retrievable even in the unfortunate event of device loss, theft, or damage.
If you're new to using iCloud and seeking guidance on how to view iCloud photos on your iPhone, join us in this comprehensive article.
Part 1: How to Check iCloud Settings on iPhone
You know that one of the primary functions of iCloud is the backup feature in case there’s something wrong happening to your device. But other than that, Apple has also designed iCloud with many other functionalities.
1) Synchronisation service
iCloud integrates with various Apple devices, such as iPads or Macs. Regardless of the devices you're using, your entire photo collection remains accessible. It streamlines your photo management and lets you seamlessly switch between devices without losing data or quality.
2) Storage optimization
The storage optimization feature offered by iCloud is equally advantageous. By activating "Optimize Storage," your devices store lower-resolution versions of photos locally while retaining the full-resolution versions in iCloud. This intelligent storage management frees up valuable space on your device while ensuring that high-quality versions are readily available when needed.
3) Access from any devices
It’s not hard to access iCloud photos. Beyond the confines of your devices, iCloud provides the convenience of universal access. The iCloud website allows you to view and manage your photos from any internet-connected device. This accessibility proves invaluable when you're away from your usual devices but still want to share or relive your memories.
4) Album sharing
The collaborative potential of iCloud is another standout feature. With effortless photo and album-sharing capabilities, iCloud allows you to create shared albums with friends and family. This is particularly useful for events or projects where multiple individuals contribute to a single collection, fostering collaboration and communal enjoyment of photos.
5) Automated photo categorization
Underpinning these conveniences is iCloud's sophisticated AI-driven search and organization. The service intelligently categorizes photos by identifying people, places, and objects, making it remarkably simple to locate specific photos without manual sorting.
6) Privacy and security
Privacy and security are paramount in iCloud's design. The service employs robust encryption and security measures to safeguard your photos from unauthorized access, providing an added layer of protection for your personal memories.
Apple's range of storage plans for iCloud ensures flexibility in accommodating various needs. It gives you free 5GB storage, or you can choose a larger paid plan. Nonetheless, iCloud's versatility ensures you can select the storage capacity that aligns with your needs.
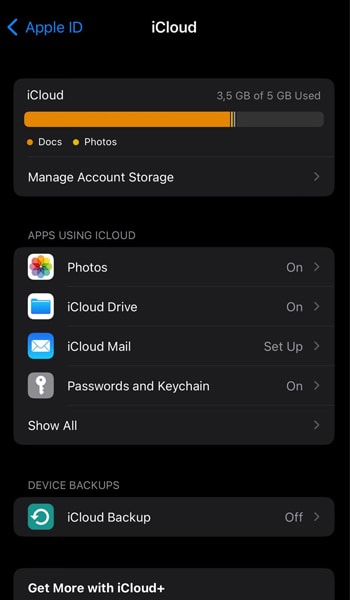
Now, let’s see how to check iCloud settings on your iPhone:
- Step 1: Open your iPhone Settings menu
- Step 2: Select your name and proceed to iCloud. From there, you have the option to either review your current iCloud storage status or activate the iCloud backup.
Part 2: Access iCloud Photos on iPhone
iCloud is designed to retain all the data related to your photos across your various devices. Integrating iCloud Photos with the Photos app ensures the safekeeping of your pictures and videos in iCloud. It maintains the data on devices such as your iPhone, iPad, Mac, Apple TV, and iCloud.com.
So, if you snap a photo on your iPhone, you'll also find that same picture on your other devices and iCloud.com. But how do I access my iCloud photos? There are a few ways to access your iCloud, depending on the devices you are using. Look and follow the step-by-step instructions below:
1) How to view iCloud photos on iPhone
- Step 1: Start by opening up your iPhone Photos app.
- Step 2: Tap on Library to view your photos.
- Step 3: Hit the Albums tab to see stuff like My Albums, People & Places, Media Types, and Utilities.

You can't find your iCloud Photos in the Photos app? Don’t worry. Here’s the tip:
- Give your iCloud settings a quick check. Then, make sure you're using the correct Apple ID.
- Make sure you have enabled the iCloud Photos. You might accidentally skip this part and think you've already switched it on.
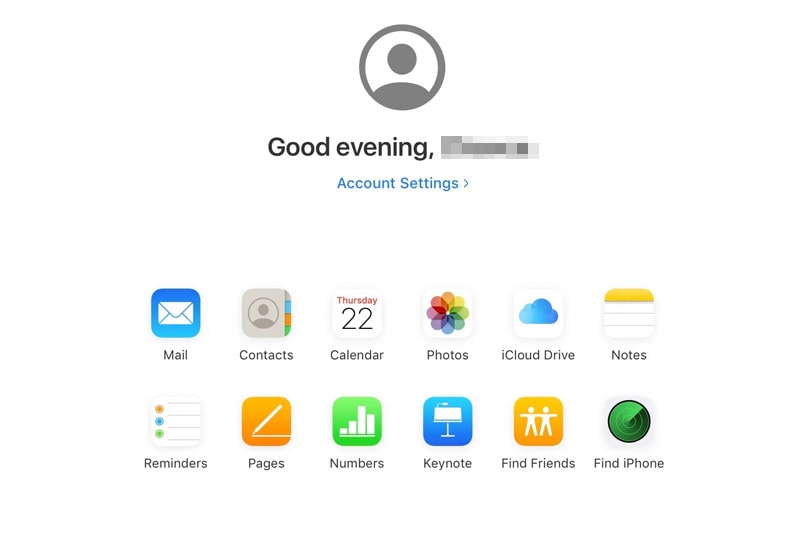
2) How to access iCloud Photos on a Computer
If you're on a Mac, look for your Photos, Albums, and Projects hanging out in the sidebar. Otherwise, you can also cruise over to icloud.com to access iCloud on your browser. Log in with your account and open up the Photos.
Bonus: Restore Your iCloud Photos with Easy Software
Restoring your iCloud photos can be a straightforward process with the right software. One of the widely used and trusted software for this purpose is Dr.Fone Data Recovery tool. It offers easy data restoration from iCloud.
Even if you are new to the software, Dr.Fone's Data Recovery tool offers several key features that help streamline the process:
- Capable of restoring a range of data types
- Preview and recover only the specific data you require.
- Secure restoration procedure, guaranteeing that no data is lost or overwritten.
- Intuitive user interface with easy onscreen navigation.
How to restore iCloud backup using Dr. Fone's data recovery tool:
- Step 1: Launch the Dr.Fone Data Recovery Tool
To ensure a successful iCloud recovery, begin by downloading and installing the most recent version of Wondershare Dr.Fone. After installation, access the tool by going to Toolbox > Data Recovery.

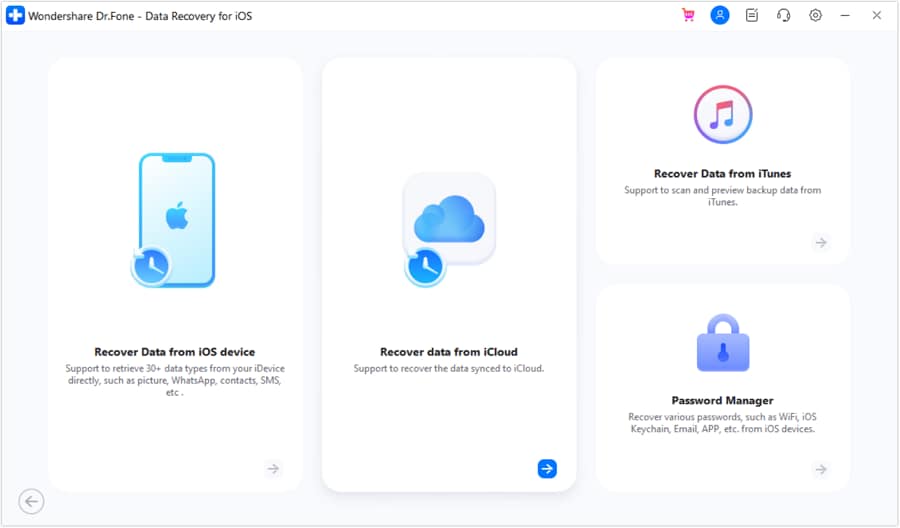
- Step 2: Choose iOS as the device type
Upon opening the tool, you'll be prompted to specify the device type. Select iOS and then opt for "Recover data from iCloud" to open the dedicated data recovery tool for iCloud data retrieval.
- Step 3: Log in to your iCloud
Provide the necessary credentials to sign in to the iCloud account from which you intend to recover data. Complete all required authentication steps to access your iCloud account for data retrieval.

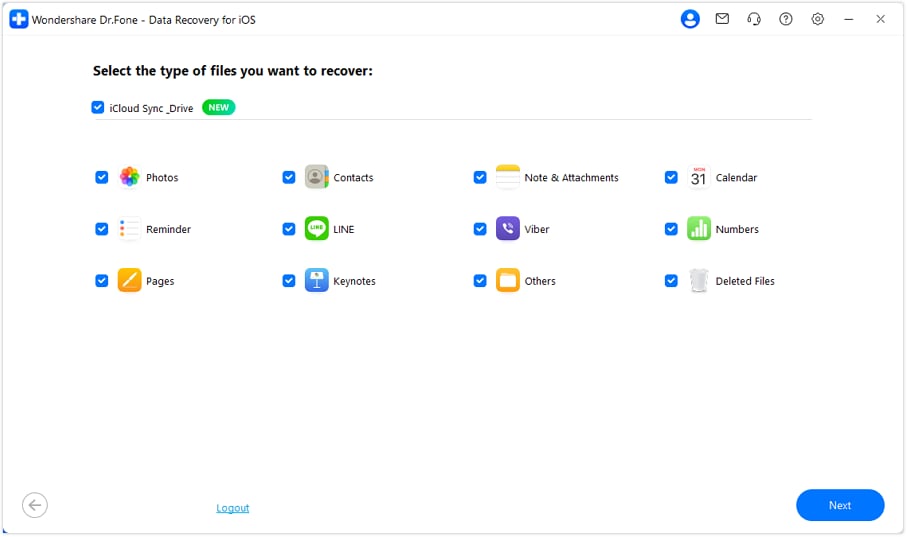
- Step 4: Select desired file types
Next, you'll need to indicate the file types you wish to recover using Dr.Fone. Mark the checkboxes for all desired data types, and then click "Next" at the bottom-right corner of the screen. This action will initiate the download process, indicated by a progress bar.
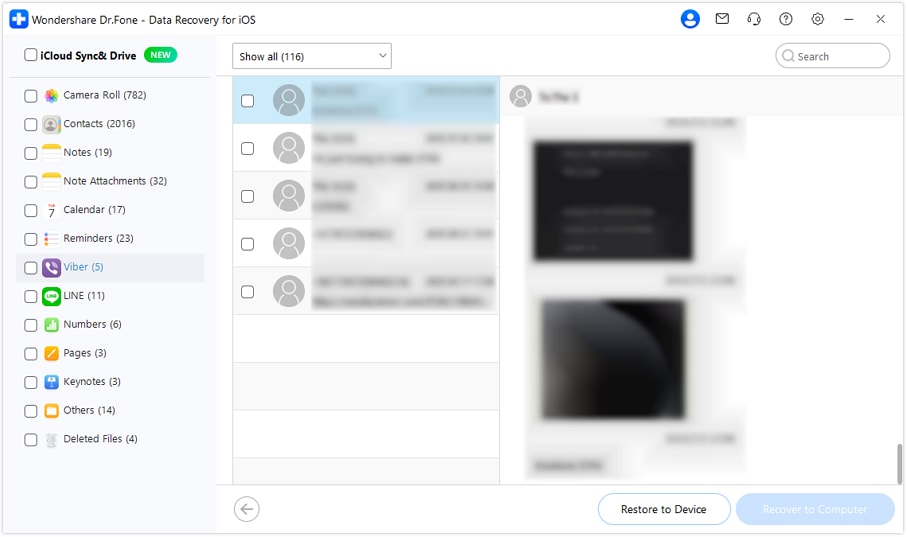
- Step 5: Choose and recover iCloud data
The window will display all downloaded data in categorized sections. You can adjust the display filter and make appropriate selections. Check which data you wish to recover and then click "Restore to Device."
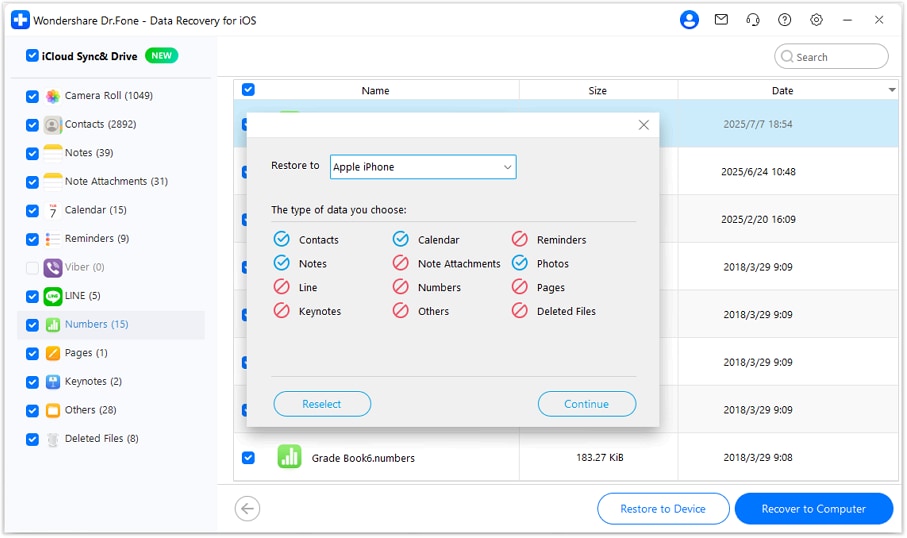
- Step 6: Restore data to a specific device
A window will appear, and you need to choose the device to which you want to restore the iCloud data. This window will also provide information about the data that can and cannot be restored. Click "Continue" to proceed with the setup.
- Step 7: Connect to your iOS device
The following screen will show the connection status with your iOS device. Once your iPhone establishes a connection, the progress of the restoration will be displayed. Wait until it finishes the data restoration and you’re good to go.

How to recover your iCloud data on your computer:
Alternatively, you can recover iCloud data to your computer using the "Recover to Computer" option. Upon selecting this option, a prompt will appear, allowing you to designate the recovery location. Proceed by choosing "Recover" to execute the recovery process successfully.
Conclusion
Today, you have learned how to see iCloud photos without any hassle. iCloud Photos is Apple's service that lets users store and retrieve their photos and videos seamlessly across their Apple devices.
When enabling iCloud Photos and using the same Apple ID, your media content is automatically synced and stored in iCloud. You can view and access them from your iPhone, iPad, Mac, and even the iCloud website.
This service offers convenience and flexibility in managing and enjoying your media collection, as long as you have an internet connection and manage your storage settings appropriately.


iCloud Manage
- iCloud Delete
- iCloud How-Tos
- 1. Save Documents in iCloud
- 2. Access iCloud Photos
- 3. Access Your Notes on iCloud
- 4. Cancel iCloud Storage Plans
- 5. Sharing iTunes Store Purchases
- 6. Reset iCloud Email on iPhone / PC
- 7. Set Up iCloud Account on Android
- 8. iCloud Two-Factor Authentication
- iCloud Issues
- 1. iCloud Backup Failed Issue
- 2. Not Enough iCloud Storage
- 3. iCloud Contacts Not Syncing
- 4. iCloud Photos Not Syncing
- 5. iPhone Couldn't Be Activated
- 6. iPhone Backup with iTunes/iCloud
- 7. Stuck on Updating iCloud Settings
- 8. iPhone Won't Backup to iCloud
- 9. Notes App Not Syncing with iCloud
- iCloud Tricks
- 1. iCloud Tips and Tricks
- 2. Recover iCloud Password
- 3. Disconnect iPhone from iCloud
- 4. Retrieve Contacts from iCloud
- 5. iCloud Alternative For iPhone/iPad
- 6. Bypass iCloud Activation with IMEI
- 7. Bypass Activation Lock on iPhone
- 8. Change iCloud Account on iPhone
- 9. Get Rid of the Repeated iCloud Sign
- 10. Download Videos from iCloud
- ● Manage/transfer/recover data
- ● Unlock screen/activate/FRP lock
- ● Fix most iOS and Android issues
- Manage Now Manage Now Manage Now
Selena Lee
chief Editor