
Video Editing
- TRY IT FREE TRY IT FREE
- 1. Edit Video+
-
- 1.1 How to Set Aspect-Ratio
- 1.2 Top 10 Free 3D Video Makers
- 1.3 Free After Effects Plugins
- 1.4 Top 50 Music Players
- 1.5 Add Backgrounds in iMovie
- 1.6 Top 30 Flac Players
- 1.7 Add Sound Effects in iMovie
- 1.8 How to Fast Forward in iMovie
- 1.9 Top 5 Online Video Encoders
- 1.10 Top 20 Facebook Music Apps
- 1.11 Top 30 Xvid Player
- 1.12 Edit Any Format with Virtualdub
- 1.14 Top 10 Free Music Video Makers
- 1.15 Top 30 Online Music Players
- 1.16 3 Easy Methods to Speed up Videos on Windows
- 1.17 Top 3 Ways to Speed up Videos on Mac
- 1.18 Best YouTube Video Speed Changer to Slow down Video
- 1.19 Increase TikTok Video Speed When Watching or Recording
- 1.20 Top 12 Android Apps to Speed up Video
- 2. Other Editing Tips and Tricks+
-
- 2.1 Top 5 Apple TV Troubleshootings
- 2.2 Windows Media Player Crashes
- 2.3 QuickTime Playlist
- 2.4 Windows Media Player Plug-in
- 2.5 Torrent Links to Download iMovie
- 2.6 7 Ways to Repair Windows Media Player
- 2.7 Post Music Notes on Facebook
- 2.8 Avid Media Composer Shortcuts
- 2.9 Share iMovie Video to iCloud
- 2.10 QuickTime Plug-in for Chrome
- 2.11 Add and Share iMovie to iTunes
- 2.12 Introduction to Vine History
- 2.13 QuickTime 64 Bit
- 2.14 Windows Media Player Not Working
- 2.15 How to Use Windows Movie Maker
- 2.16 Top 10 3D Video Cameras
- 2.17 Top 5 QuickTime codecs
- 2.18 Use Windows Media Player as a DLNA Server
- 2.20 History of Windows Movie Maker
- 2.21 YouTube Video Editing Software
- 2.23 10 Hilarious Graduation Speeches
- 2.24 Free Online iMovie Alternatives
How to Share iMovie Video to iCloud with Easy Steps
by Christine Smith • 2024-01-11 10:26:42 • Proven solutions
Saving and protecting your files is extremely important. You can lose a lot of important videos, photos and data. Saving it to your desktop is the worst thing you can do. If a virus infect your computer, or your operating system is damaged, you will lose all your data. Burning it on a DVD is a better solution, but it isn’t perfect as well. The best, is to upload your files on iCloud. It is fast and your files will be protected. Also, you can share them with your friends. This means that you will use all benefits of iCloud. Sadly, the basic plan doesn’t offer a lot of space. If we know that today’s devices make videos that require a lot of space, you will need to upgrade your plan, eventually.
- Patr1. How to share/upload iMovie videos to iCloud on Mac
- Part2. How to share/upload iMovie videos to iCloud on iPhone/iPad
Part1. How to share/upload iMovie videos to iCloud on Mac
There is no point to upload each file to the iCloud. You can use the automatic iCloud uploading. This means that any file you open or create with the iMovie, will be uploaded to the iCloud. In order to use this feature, you must enable it. It is so useful that a lot of users use it every day. It also eliminates the danger of accidentally deleting a file, which wasn’t uploaded to the iCloud. iOS will never forget to upload your projects.
1. Go to the Apple menu and locate System Preferences. Locate iCloud and click on it. You must be signed in. If not, sign in or make an account on iCloud. Then, you can check the Documents & Data checkbox. If you don’t have an account, you can make it. You can Google iCloud and register on their website. This is a simple task that requires a couple of minutes.

2. Click on options near the Documents & Data. There, you must check the IMovie. This means you want to upload files from the IMovie to the iCloud. If this option isn’t checked, check it now. You will see other programs as well. All programs that are checked, will upload files to the iCloud account. You can access them any time you want. Also, your friends cannot modify or delete them. Remember that if you use a lot of programs, you will need a lot of space on iCloud.

3. Go to the iMovie and locate Preferences. There, you must find the “Automatically upload content to iCloud” option. Check it and you are done. You can disable this option on the same way. Now, every file that is created with the IMovie, will be uploaded to the iCloud. You won’t lose a file ever again. Don’t give your email address and password to other people. If some of them use your iCloud account and iMovie, it will upload files to the account. In this case, a person can access and delete your files. Automatically upload content to iCloud is a useful option, but it requires more space on your iCloud account. If you make a lot of projects with an IMovie, you will need more space on your account.

4. Now, you can share these files. All you need to do is to click on the Share button on your Mac computer and choose the "Share Link via iCloud." Then, you can choose to share via Facebook, Twitter and etc. Remember that you will have to provide additional information about your files. When you choose the option, confirm and you are done. You can also copy link. This is useful if you want to share your files on blogs or forums. Remember that all people will be able to see your files. If you have private files and information, avoid sharing with unknown people.

Part2. How to share/upload iMovie videos to iCloud on iPhone/iPad
Many users use IMovie on their IPhones and IPads. Although, it doesn’t have the same options as a computer version, IMovie for IPhone and IPad can make important addition and changes to your videos. The interface is very easy to use and it looks interesting. This is an important addition to the iOS 8 and 9. Older versions, like iOS 6 doesn’t have an interesting interface. You will have to upload files to the iCloud. In order to do this, you must have an account on iCloud. Also, you must be signed in. If you don’t have an account, register from the app or on the official website.
1. The first step is to upload iMovie videos to the iCloud. You will do it by clicking on the iCloud button. It is located in the main menu. Your video will be uploaded to the iCloud.

2. Now, you can share your videos. All you need to do is to tap on a project you want to share and tap on the share button. Choose iCloud sharing and choose the album you want to share.

3. Choose the contacts you want to share a file with and you are done. They will be able to see your file. It is very quick and easy way to share files with your friends. In addition, you can add more information and a description.

Uploaded files can be modified, shared or deleted. Of course, only you will have these options. Your friends can only see those files. Also, iCloud storage is the best and safest way to protect your files. Nobody can delete them, except you. However, storage on iCloud isn’t free. This means you will have to choose some plan that suits you. The more space you need, the more money you will need.
When your files are uploaded to the iCloud, you can access them via your computer, IPhone, IPad or other device. You will have to log in to your account in order to be able to download, view or delete a file. Remember that you have an option to delete a file from iCloud, from your device or from everywhere. Deleted files cannot be restored. Also, be careful when you give your device to somebody. If you are signed in to the ICloud account, a person will have access to your files.
 Wondershare UniConverter (originally Wondershare Video Converter Ultimate)
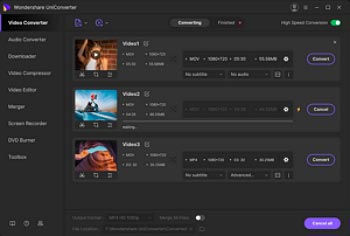
- Convert video to over 1000 formats, including MP4, AVI, WMV, FLV, MKV, MOV and more
- Convert to optimized preset for almost all of the devices.
- 30X faster conversion speed than any conventional converters.
- Edit, enhance & personalize your video files
- Burn and customize your DVD with free DVD menu templates
- Download or record videos from 10,000+ video sharing sites
- Versatile toolbox combines fix video metadata, GIF maker, VR converter and screen recorder
- Supported OS: Windows 10/8/7/XP/Vista, Mac OS 10.15 (Catalina), 10.14, 10.13, 10.12, 10.11, 10.10, 10.9, 10.8, 10.7, 10.6


Christine Smith
chief Editor