Wondershare UniConverter
-
 Convert 4K videos to 1080p, 720p, 480p and more resolution without losing quality.
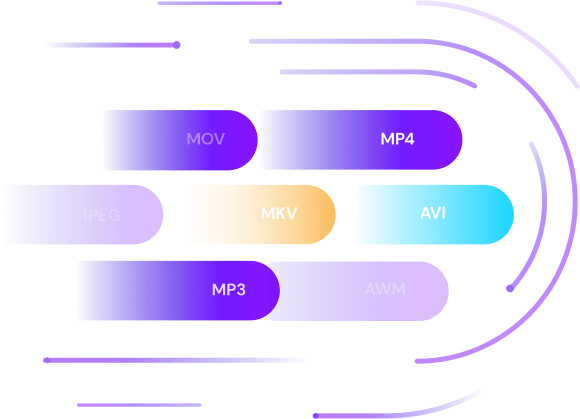
 - Support 1000+ formats including MOV, MP4, AVI, MKV, WMV, M4V, etc.
- Edit 4K videos with trimming, cutting, merging, adding subtitles, applying effects, etc.

4K Video
- 1. Convert 4K Videos+
-
- 1.1 Convert 1080p to 720p
- 1.2 Convert 4K to 1080p
- 1.3 Convert Videos to HD 1080p
- 1.4 4K vs 1080p
- 1.5 Convert Videos to MP4 HD
- 1.7 4K Online Video Converter
- 1.8 4K Video Converter Apk
- 1.9 Top 4K Video Converters
- 1.10 Convert 4K Tamil Movies
- 1.11 Convert 4K Hindi Movies
- 1.12 Convert 4K Test Videos
- 1.14 4K Video Songs Converter
- 1.15 4K to MP3 Converter
- 1.16 4K Movies Converter
- 2. Tips & Tricks for 4K Conversion+
All Topic
- DVD Users
- Social Media Users
- Camera Users
- Photography
- Creative Design
- Movie Users
- Travelling Fans
- Educational Users
- More Solutions
- Holidays
- Game Lovers
- Other Tips
How to Edit 4K Footage in Adobe Premiere
by Christine Smith • 2024-01-11 10:27:41 • Proven solutions
Do you want to be a pro of using Adobe Premiere to edit videos? Check those tips and tricks you may not know, and let's start from Adobe Premiere Plugins.
- Part 1. How to Edit 4K Footage in Adobe Premiere
- Part 2. Best Alternative for Premiere to Convert and Edit 4K Videos Easily
Part 1. How to Edit 4K Footage in Adobe Premiere
1. What Are 4K Videos
With recent advancements in technology and a never-ending urge for real cinematic home experience, we have witnessed rapid advancement in the field of display resolution. In recent years we have heard a lot about the 4K. What exactly is 4K and its purpose? You might have heard a shopkeeper stating about characteristics of a particular TV, and somewhere mentioned about UHDTV. 4K is a horizontal pixel resolution technology that has become a standard resolution for movie production and high-end imagery. As the name applies, 4K contains 4,000 pixels per standard image.
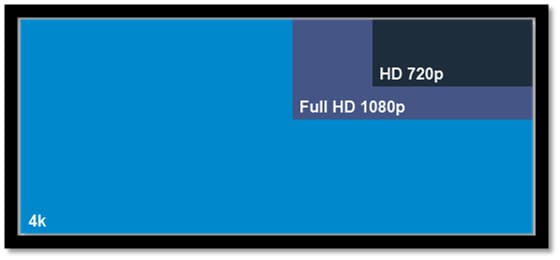
However, 4K technology has different resolution standards when it comes to the television display. While a standard raw 4K file would have a resolution of 4096 X 2160 Pixels for industrial use, the UHDTV (Ultra High Definition Television), uses 3840 X 2160 Pixels. The 4K Footage has been adapted as a standard resolution for cinemas and industrial recordings. However, the usual vertical Television has relatively limited pixel viewing. In short, a 4K resolution would give better and wider viewing of a frame, with much more crisp result than a 720P television. The photo below shows the view angles difference between the three image resolutions.
Although 4K image technology has been in commercial usage since the invention of high-quality cameras in 2003, it was not until 2009, that this technology was incorporated into television and for home entertainment purposes. Today there are various television brands in the market that offer 4K compatible televisions to the general public. The UHDTV services are a commercial name given to the 4K compatible television. However, these products are pricey and not in the reach of buyers with a tight budget. However, an important thing to note here is that 4K files cannot be edited or changed through their horizontal properties; therefore, such files will have to be edited by the vertical method.
2. How to Edit 4K in Adobe Premiere
It is very common for you to end up with a 4K file on your disk, which seems to put your computer to test. Not only will you get the error while trying to open the file, but the computer will also slow down to its minimum capacity, and the screen will most likely hang. Even fast computers with a high-end RAM and speedy processor seems to give up when it comes to 4K files. The problem is with the image editing software and not just a slow computer spec. This is where Adobe Premiere comes in to help you edit 4K files easily.
RED is one of the most popular cameras for high-end 4K industrial recording. This is the kind of camera that is used to produce sci-fi Hollywood movies and all other high standard recordings. The video footage recorded by RED cameras is 4K by default. Therefore, you will need to edit the files before you can use them on a variety of PC’s and/or televisions. Follow the steps below to see how you can edit 4K footage in Adobe Premiere.
Step 1. Update importer plugin
Open Adobe Premiere Pro and look for an update for the RED importer plugin. You can search for the importer plugin over the internet. Adobe has an updated version of the importer placed on their website. It is free to download instantly. The file is not big and should only take a few seconds provided that you are using a fast broadband connection. Adobe Premiere CS6 will come ready with these updated files. However, you will need to manually download these files for version 5.5 Premiere or below. Once the file is downloaded, you can unzip the folder and install both files manually. The folder will be contained documentation in case you need to read instructions.
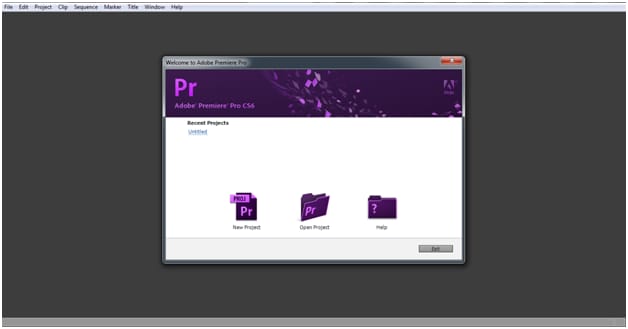
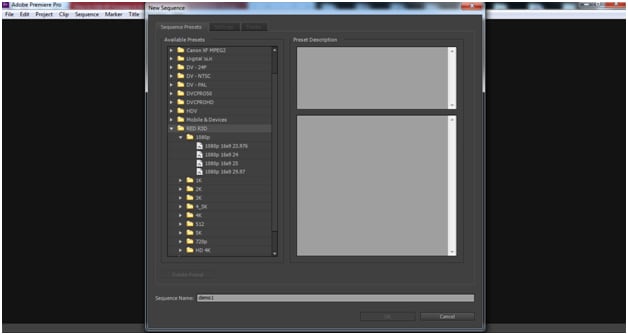
Step 2. Build a new project
Once done, start the Premiere Pro and click on "Start a New Project." Once you choose to do this, a pop-up window will appear with lots of options on the left-hand side of the screen. From there, you will choose RED R3D (Note: It is important to know the exact type of file which you have and make the selection accordingly). These selective options come ready with CS6, and you do not have to install them manually.
Step 3. Choose the settings
As you select the RED R3D option, a subcategory will appear below the button and give you further options. Here, choose 1080p that will appear on the top (Note: You can choose a different output if you have specific standards). The main reason for choosing a 1080P output is because of the speedy process. Once the editing is done, you can change it back to the 4K version once editing is done. Otherwise, it will be a pain in the neck to edit a 4K file, especially if you do not have a superior PC.
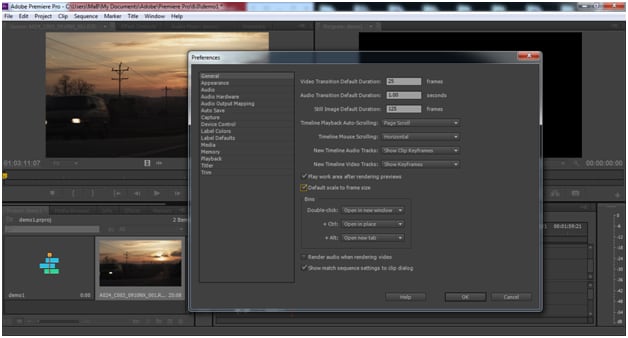
Step 4. Import 4K videos
Next, locate and import the 4K footage file from your drive. You will see that the file is scaled to 100 percent. Thus, the footage will be zoomed to a high standard and would need to be scaled down to fit your 1080p editing window. However, the file is still in the 4K format, and it would not be helpful to scale it directly. Thus, go to the ‘Edit’ tab, and choose ‘Preferences’ > General and check the box reading “Default scale to frame size.” Delete the clip and bring it back again. You will see how it fits the editing screen perfectly. A 47% scaling ratio should work fine with this. You can do this by moving the red bar towards the left.
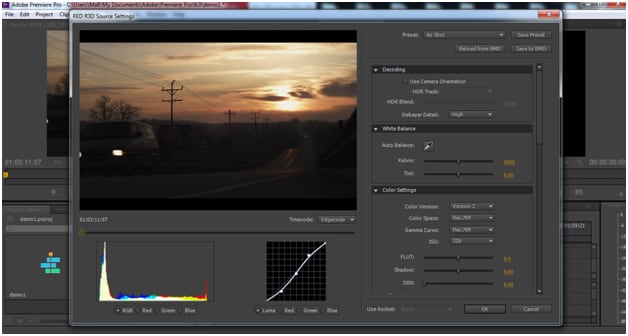
Step 5. Edit 4K videos
For the RED Files, you can further edit these by right-clicking on the project window and choose “source settings.” It will open up the footage along with various options for brightness, curves, gamma setting, and a lot more. This will automatically update the footage in your editing window. Once you have done the desired editing, you can save the project and view it further in after-effects.
This was a general 4K editing for RED files. However, you can choose the settings as per your source file.
Part 2. Best Alternative for Premiere to Convert and Edit 4K Videos Easily
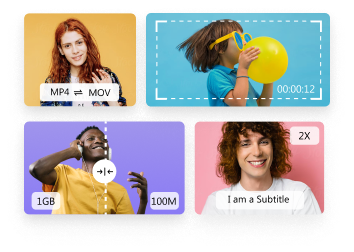
This is a basic tutorial about Adobe Premiere, professional video editing software. However, if you can't import some formats to Adobe Premiere or video editing is new to you, consider Wondershare UniConverter, which is a complete video toolbox that supports 1000+ formats conversion. You can convert 4K videos to 1080p/720p/480p resolution and any format easily, even simply trim, cut, merge videos with it.
Wondershare UniConverter - Best 4K Video Converter for Windows/Mac
-
Convert 4K videos to 1080p, 720p, 480p, and other customized video resolution.
-
Support 1000+ video formats, including MP4, MOV, MKV, WMV, AVI, etc.
-
90X faster conversion speed than any conventional converters with no quality loss output.
-
Edit video files with trimming, cutting, adding subtitles, applying effects, and more.
-
Burn video to playable DVD with attractive free DVD template.
-
Download or record videos from 10,000+ video sharing sites by pasting URL.
-
Versatile toolbox combines fixing video metadata, GIF maker, video compressor, and screen recorder.
-
Supported OS: Mac OS 10.15 (Catalina), 10.14, 10.13, 10.12, 10.11, 10.10, 10.9, 10.8, 10.7, 10.6, Windows 10/8/7/XP/Vista.
Steps on How to Convert and Edit 4K Videos Using Wondershare UniConverter
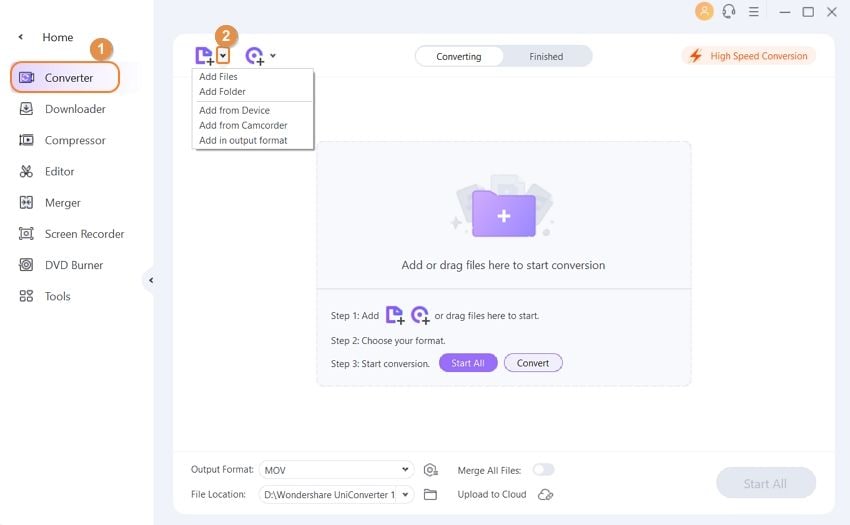
Step 1 Add 4K videos you need to convert or edit.
Free download Wondershare UniConverter and install it on your PC/Mac, open it, and click the +Add Files icon to add 4K videos you need to edit or convert.
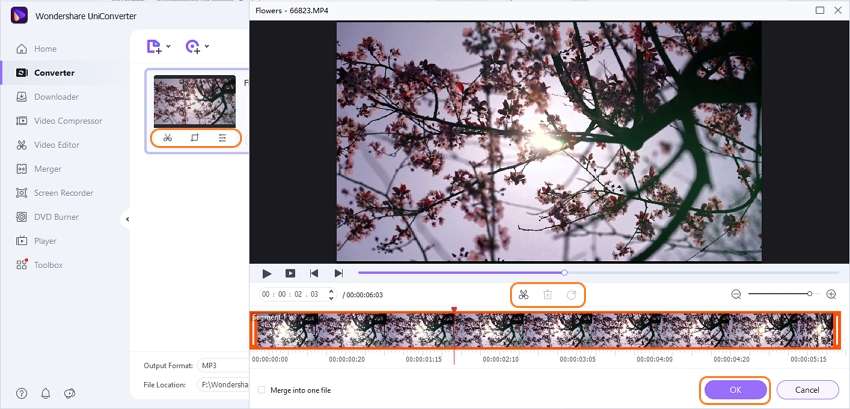
Step 2 Customize 4K videos with simple editing features.
All added videos will be displayed as thumbnails on the interface. Click the Edit icons to trim, cut, merge your 4K videos easily, or add effects, subtitles, watermarks to the 4K videos.
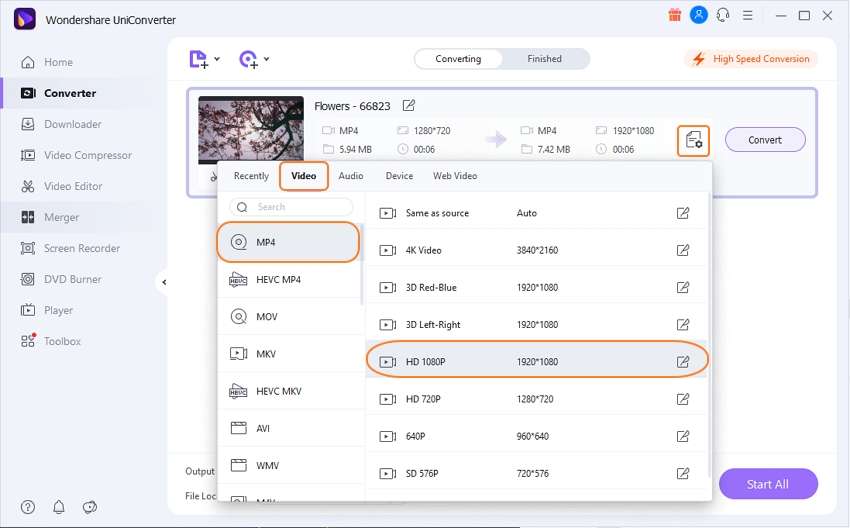
Step 3 Choose the resolution and output format for 4K videos.
Hit the Setting icon, and choose the Video tab to select your desired output format and resolution. You can also click the Create Custom button to make more customization.
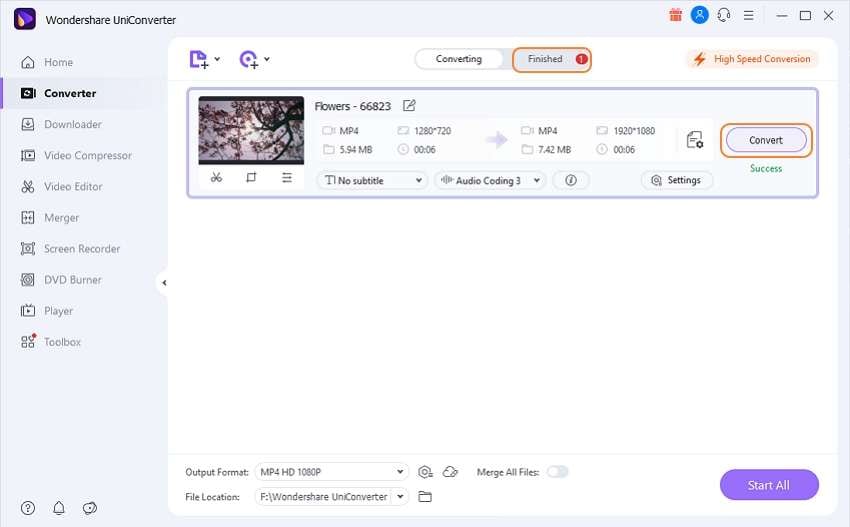
Step 4 Convert 4K videos with Adobe Premiere alternative.
Finally, click on the Convert button to change 4K videos format and resolution. Turn on the High Speed Conversion mode will save your time. Get the converted files under the Finished tab, and you can import it to Adobe Premiere for editing easily now.
Your complete video toolbox

Other popular Articles From Wondershare

Your AI Video Toolbox
One-step solution for all your video conversion and editing needs.
 Security Verified. 4,380,764 people have downloaded it.
Christine Smith
chief Editor